Image Map
Showing posts with label powerpoint. Show all posts

Thursday, July 16, 2020

Lesson Plan Template Tutorial - Lesson 1

Years ago I wrote a blog post about how I create a tech lesson plan to project on my SMARTboard. You can read that original post HERE. Since then I have continued to do this to save time and energy and make use of every second of class time. Some ways this helps in my classroom:
  1. It provides a visual schedule for students to keep track of what needs to get done and I avoid the "What are we going to do today?" questions
  2. I can link video clips, audio clips, and even attach extra projected files with hyperlinks
  3. It is something pretty for me and my students to look at

If you do not want to start from scratch and would like some cute backgrounds to start with you can download my pre-made Lesson Plan Templates. I have a free version that provides one background for Kindergarten-5th Grade, as well as a version with multiple different backgrounds for purchase. Please note that this is NOT necessary. I personally choose to have a different background each month to keep things fresh, but you could definitely keep the same background for the whole year or even just have a blank slide. That is how I started. Links for my backgrounds are at the end of this blog post. (See below to see a picture of my title page for an April slide):
April Title Slide

Today, I will start with some of the first steps you should follow on PowerPoint or Keynote to get started. You also can do this in Google Slides and I'll put up a second tutorial with how to do this in Google Slides. I found this strategy helpful when teaching online this spring. I could send them the Google Slide lesson plan with linked videos, games, activities, audio files, etc.

  1. Begin with your blank slide that you want to list your lesson plans on. Here is an example of what mine looks like:
    Empty Slides
  2. Click insert and add a text box in the blank area of your lesson plan template. You can add your lesson plan information in that area.
    Adding a Textbox
  3. When you are done entering your lesson plan information it may look something like this:
    Prepared Slide with Lesson Plans
  4. Once you have your lesson plan typed up you can hyperlink text to a different file or video. In order to do this you want to highlight the text and click insert hyperlink.
  5. You'll get a prompt like you see below and you can click the file you see or browse for another file. When you have selected the file you want then click "ok".
    Hyperlink to a different file
  6. You could also hyperlink the file to a different slide in your lesson plan presentation. To do this click "insert", then "hyperlink", then click "place in this document", select the slide you want it to go to, then click "ok".
    How to Hyperlink to a different slide
  7. Another great use of this is to add an audio file to your presentation. I like to do this for adding folk dance music, beat motion songs, or a piece of Classical music we will be listening to. Not matter what you want it is simple to add. Click "insert", "audio", select whether you want something from your computer or you are recording it yourself, then click "ok".
    Adding an Audio File
  8. When you are finished you will see a speaker appear like you see below:
    Audio Added
Hopefully this tutorial helps you get started. I will create another blog post soon to give directions on how to do all of this on Google Slides for those interested in using Google Slides instead.

Below is a link to my Lesson Plan Templates for download on my Teachers Pay Teachers Store. My full version will be on SALE for the next few days. ENJOY!
Lesson Plan Templates - Full Version Lesson Plan Templates - Freebie

New-Signature-2020

Sunday, October 13, 2013

Freebie Friday - Beat, Rhythm, Ta, & Ti-Ti
Wow! Sorry my Friday post is now being posted very early on a Sunday! It ended up taking me a little bit longer than I thought to organize everything I wanted before posting my blog post. I have been busy working on a BUNCH of files for my Teachers Pay Teachers store. All the files I plan on using with my own 1st Grade students or have already used with my 1st grade students. I'm very excited about them! (To see the actual files click on the center of the pictures provided.)

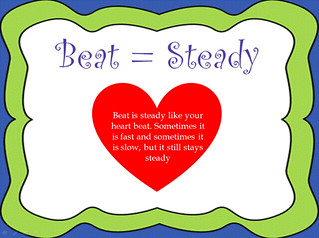
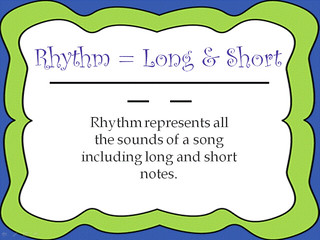
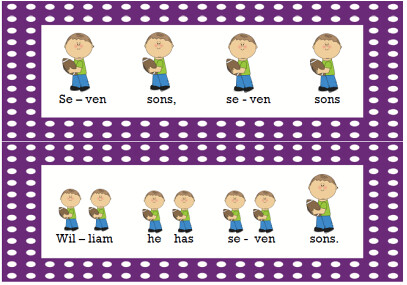
First, I put together a PowerPoint that introduces the difference between Beat and Rhythm:

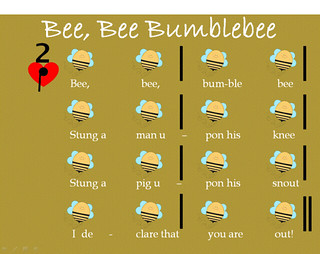
Then, to reinforce this concept I made a fun manipulative to use either for full classroom practice or for small group activities:

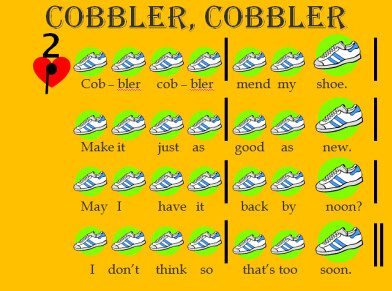
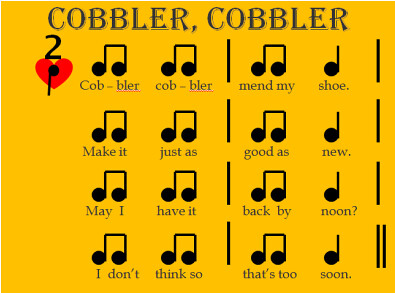
Now that my students are recognizing the difference between beat and rhythm they get to learn about ta & ti-ti with this powerpoint:

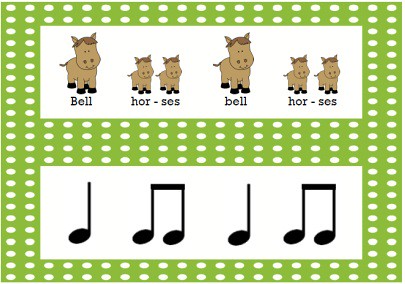
And another fun manipulative to reinforce this concept of matching picture rhythms with music notation:

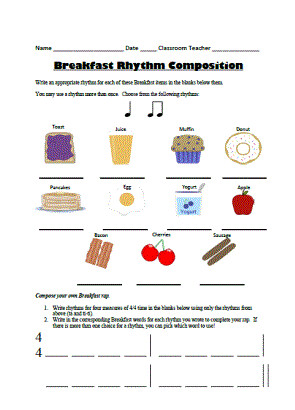
Finally, I put together a bunch of breakfast foods for students to sort as Ta's or Ti-Ti's. This also comes with a composition worksheet for 1st graders to create their own breakfast food raps:


Now for the FREEBIE for Emily's FREEBIE FRIDAY:


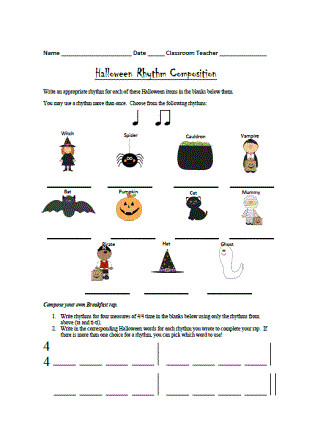
Along with the breakfast food rhythms and compositions, I created a Halloween version of this same file. As a special Freebie Friday I am offering this file completely free on my Teachers Pay Teachers Site. I definitely think this is a great file and has several fun activities you can use with your young students. Find the file by clicking on any of the pictures below and downloading it from my Teachers Pay Teachers store!

Friday, September 27, 2013

Freebie Friday - In the Woods


As part of Mrs. Q's Freebie Friday I am offering the following Freebie:
IntheWoods3
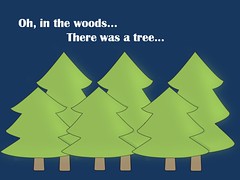
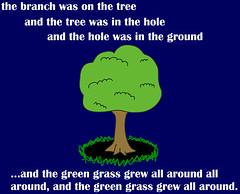
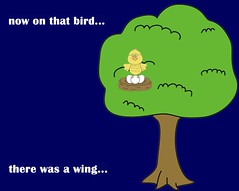
I recently created an adorable file for the song In the Woods (also known as The Green Grass Grew All Around). If you are unfamiliar with it you should check out Beth's Music Notes blog post HERE. The version I sing has a few changes in lyrics, but the melody is the same and you can get the general idea.

I sing this song with my 1st graders and they absolutely love it. It is great for practicing singing short phrases and echoing. To make the song even more fun, after a few times of singing it without visuals I add the SMARTboard file for fun pictures. I recently updated it with cute pictures from My Cute Graphics.

In order to share this with you I have uploaded it as a SMARTnotebook file, a powerpoint, and a pdf. If you do have a SMARTboard I have already linked up each page, so you just click on the last lyric of each page to continue with the song. If you have a PDF or powerpoint you flip the page and they go in order. I'm sharing all these files through Dropbox, and I don't think you'll have a problem downloading them, but if you do please let me know! (Click on the picture to get the link to download the file)

Powerpoint Version:
Powerpoint Version
Follow this link -> https://www.dropbox.com/s/z7ds9h2ab25domh/IntheWoods.pptx
PDF Version:
PDF Version
SMARTnotebook file:
SMARTboard file
Please let me know if you use this file with your students and things that you liked or disliked about this freebie. I'm always looking for ways to improve! :)

Friday, August 10, 2012

What Did You Learn?

Whenever I can find the time at the end of a day, unit, class, etc. I like to ask my students a few questions about the class. I do this for a number of reasons. First of all, I like to know what students enjoyed the most about the class. I also want to know what they enjoyed the least. This is not to say that I will get rid of what they enjoyed the least and keep what they enjoyed the most. It is just my way of getting student input and it helps me plan for the future. I also like to ask students what they learned from taking this class. If they can't tell me anything they learned, then what was the purpose of taking the class?

The last day of summer school, I only had the first hour class, which was my Fun with Technology class. We had a few minutes at the end of the class, so I asked them these questions about their experiences in the class. I was pleasantly surprised with the results.

The first question was what they enjoyed most about this class.
Here were some of the answers:
  • Creating pictures for the Goldilocks project
  • Having time to play different puzzle games online
  • Using powerpoint for the first time
  • Adding animations to their presentations
  • Presenting their animations

The second question was what did they enjoy the least about the class. The majority answer for this was of course the typing practice. This was not surprising to me and I told my students that typing practice was one of my least favorite activities in computer class, too. However, it is important and helps you type faster and faster over time.

The final question: What did you learn?
Here are their answers:
  • Homerow for typing
  • How to animate on PowerPoint
  • How to add pictures to a PowerPoint
  • How to add additional slides in PowerPoint
  • How to add and delete transitions on a PowerPoint
  • How to export images in Pixie
  • How to add stamps, pictures, and cool effects in Pixie
It is so exciting to hear about all the great things they learned in class. It makes teaching the class a success!

If I were to teach this class again, I would definitely keep the format of the class the same. I liked that the students had time to practice typing, play games, and work on a project every day of class. I feel like it was the right balance of work and play for the students.

I really liked the project, but would probably change it for next year so that the same students could take the class again if they liked. I would want to continue to include PowerPoint and Pixie in the project as these seemed to be big hits with the kids. Maybe even a project that really focused on all the cool things that PowerPoint can do. I think the kids would really like that.

That is all for now!
Thanks for reading,
~Brittany De Laruelle

Thursday, July 26, 2012

Goldilocks Final Project Pictures

Summer school ended last week Friday. I still have a lot I would love to share with all of you, and I promise I will. However, I decided it would make the most sense to finish talking about Fun with Technology before moving on to the next summer school class I taught (Fun in the Sun).

Last week, students finally finished their Goldilocks project I told you about earlier. They then were allowed to share them with their classmates. I was happy to see that everyone that came to school last week DID share their projects with the class. This was very important to me as they did spend four weeks working on them. However, I have learned from experience that sometimes it is better to not FORCE students to share, but instead encourage everyone to share. This normally makes kids feel like they have a choice, but they normally get so excited after watching everyone else share, that they want to share their work, too.

(Note: There are times I EXPECT everyone to share. However for something like this it is not necessary and the kids are willing to share on their own.)

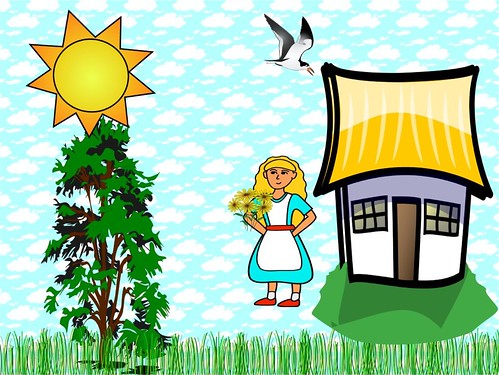
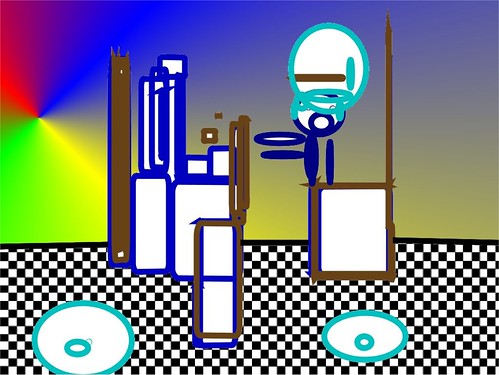
Just to give you an idea of the great work my students did, here are some examples of pictures the students created for the story:


-Goldilocks Final Project Pictures-

There once lived a little girl who was called Goldilocks because her hair shone like gold. She was very fond of wild flowers and often went into the woods to pick them.

One day she walked and walked, and was soon a longer way from home than she had ever been before. In fact, she was lost. But she hurried on, hoping to meet someone who might be able to tell her how she could get home.

On and on she wandered and finally in a particularly lonely spot she happened onto a neat little house. It was really the house in which lived the three bears -- the Papa Bear, the Mama Bear, and the little Baby Bear -- but of course Goldilocks didn't know that.

The little girl went up to the door and knocked. There was no answer. She knocked again. Still no answer. And so she opened the door and went in. She was very tired and hungry.


Goldilocks looked around, and saw a little table set with a nice white cloth, and on the table were three bowls -- a big blue bowl, a middle-sized bowl, and a little yellow bowl. These three bowls belonged to the Papa Bear, the Mama Bear, and the Baby Bear.

Goldilocks lifted up the covers to look into the bowls. Each was full of delicious-smelling porridge which the three bears had left there to cool while they went for their early morning walk in the woods. Later they would return for a hearty breakfast.

Goldilocks picked up the spoon which was in the big blue bowl and tasted the porridge belonging to the Papa Bear. It was very hot, much too hot for the little girl to eat.

The little girl then turned to the red bowl and tasted the porridge that belonged to the Mama Bear. It was much too cold.

But there was still another bowl, and Goldilocks dipped her spoon into the porridge in the little yellow bowl, the one that belonged to the Baby Bear. How good that porridge smelled!

Goldilocks tasted it. Um-m-m-m! It was just right, and so she ate and ate and ate until there was not a bit of porridge left in the Baby Bear's little bowl.


After having eaten, Goldilocks wandered into the living room to sit down. There along the wall stood three chairs -- a big chair, a middle-sized chair, and a little chair.

She tried the big chair, which belonged to the Papa Bear, but it was too high, much too high for such a little girl.

Then she tried the middle-sized chair, which belonged to the Mama Bear, but it was too wide, much too wide for Goldilocks.

There was still a third chair, the one that belonged to Baby Bear. It was a cozy little chair with a green leather seat, and it looked like a very good chair for a tired little girl to rest in.

And so Goldilocks sat down in the Baby Bear's chair. It was just right, and she sat so hard that she broke it. The little girl got quite a surprise when she tumbled to the floor, but she immediately picked herself up and decided she would go upstairs and look around. She was quite sleepy by now, and maybe she could find a nice bed upon which to lie down.


Then Goldilocks climbed the stairs to the bedroom, and there found three beds -- one for the Papa Bear, one for the Mama Bear, and one for the Baby Bear. They were all fresh and clean.

Goldilocks lay down on Papa Bear's great big bed, but it was too hard.

Then she tried Mama Bear's middle-sized bed, but it was much too soft.

There was still a third bed -- Baby Bear's bed -- with a pink and white spread on it. Goldilocks tried the littlest bed, and it was just right, and so she curled up and was soon fast asleep.


Now while Goldilocks was sleeping, the bears came home from their walk.

They were very hungry and went at once to the kitchen to eat their porridge.

The Papa Bear had picked up his spoon and was about to begin eating when he suddenly growled in his big-bear voice, "Somebody has been eating my porridge!"

When the Mama Bear saw her bowl, she said in her middle-sized bear voice, "And somebody has been eating my porridge, too!"

Baby Bear saw his empty bowl, and began to cry. "Somebody has been eating my porridge, and has eaten it every bit!" he wailed.


Then the three bears went into the living room to sit down and rest.

Papa Bear noticed that his chair had been pulled out of its usual position.

"Somebody has been sitting in my chair!" he grumbled in his gruff voice.

"And somebody has been sitting in my chair!" said Mama Bear.

Baby Bear began crying harder than before. "Somebody has been sitting in my chair and has broken it all to pieces!" he sobbed.

Baby Bear had no chair to sit on, and so the three bears decided they would go upstairs to rest. They would take a short nap.


As they entered the bedroom Papa Bear glanced at the big bed. "Somebody has been tumbling in my bed!" he growled.

"And somebody has been tumbling in my bed!" said Mama Bear in her turn, walking over to the middle-sized bed and carefully smoothing the spread, which was quite rumpled.

All this time Baby Bear had been staring hard at his own little bed. Finally he found his voice and piped up, "Somebody has been tumbling in my bed, and here she is!"

At the sound of the Baby Bear's voice the little girl awoke with a start. She sat up and glanced about her. Then she sprang out of bed, and dashed down the stairs and out of the house as fast as her legs would carry her.

And Goldilocks never, never went near the house of the three bears again.


---------------------------------------------------------------


Each of the pictures above is from different students, so they do not all necessarily go together. However, you can get an idea of what students did to represent this story.

I hope you enjoy the creativity and expression of my students' work.

Thursday, July 19, 2012

Animations and Transitions

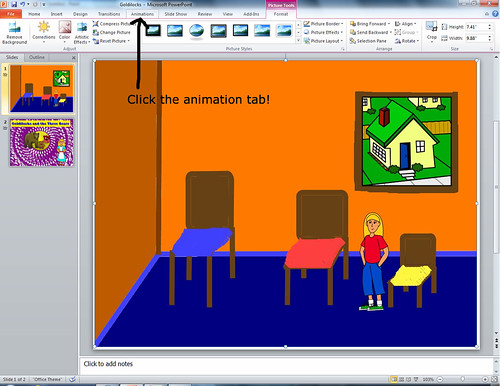
Once students completed, exported, and transferred all their pictures onto the Powerpoint (which took about 3 1/2 weeks) they were finally ready to do the 'fun stuff' - animating their PowerPoints. Many of the students in my class had never even worked in PowerPoint, so they had no idea how to add animations or transitions. The directions were they had to have at least one animation and/or transition for each slide.

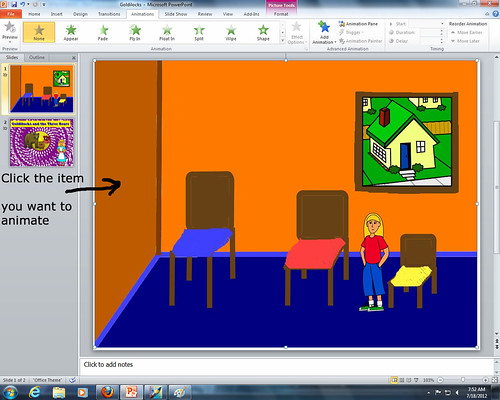
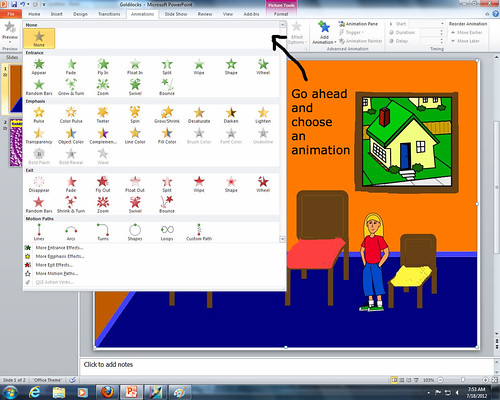
In case you aren't familiar with how to use PowerPoint, here is a short tutorial using PowerPoint 2010.

1) Click the animations tab:
PPAnimation1

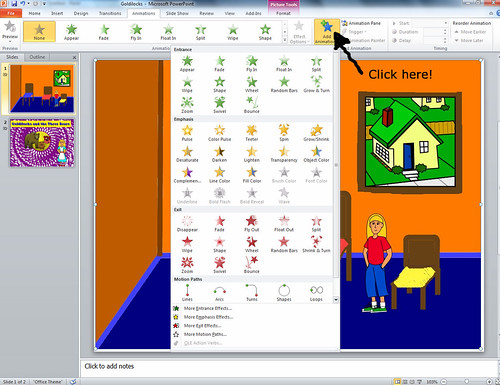
2) Click the item you want to animate:
PPAnimation2

3) Use the drop down menu to show you all your different options. Notice that the green would be entrances, yellow stress, and red exit. It is best if you do not choose several entrance or several exit animations, otherwise you will end up with a lot of clicks that show nothing. :(
PPAnimation3

3) Once you choose an animation it may give you other choices to the right of it. These choices could affect the direction or how it works. It is pretty cool!
PPAnimation4

4) If you want to add another animation make sure to click the 'ADD ANIMATION' button. If you do not it will only allow you to have ONE animation per item.
PPAnimation4half

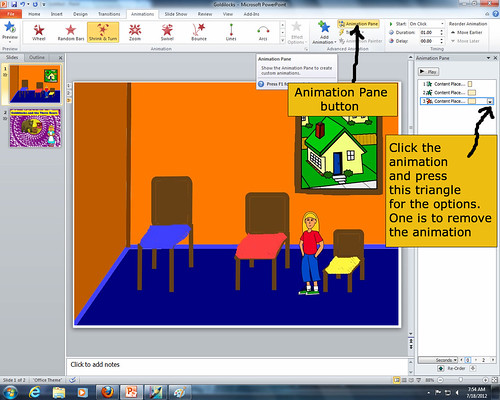
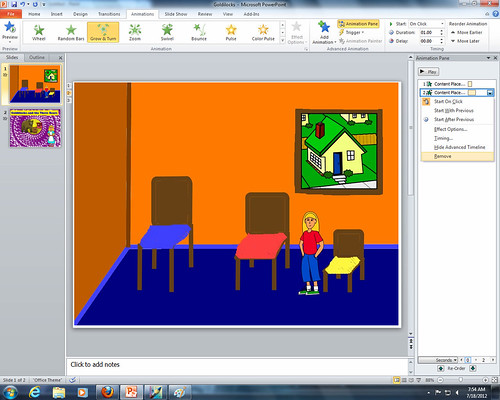
5) You can remove animations or reorder animations by clicking the 'ANIMATION PANE' button.
PPAnimation5

6) Move the icons around or click the arrow and remove the animation altogether.
PPAnimation6

Along with animating your slides you can also add transitions between slides.

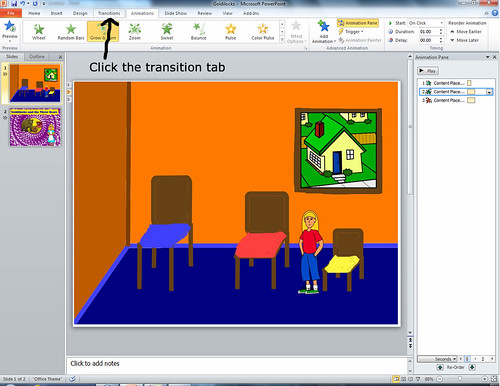
1) Click the transition tab:
PPTransition1

2) Click to expand the menu and choose from the many options:
PPTransition2

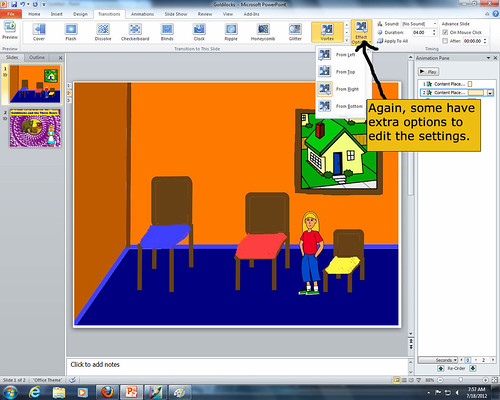
3) Some have extra settings that you can manipulate, just like the animations:
PPTransition3

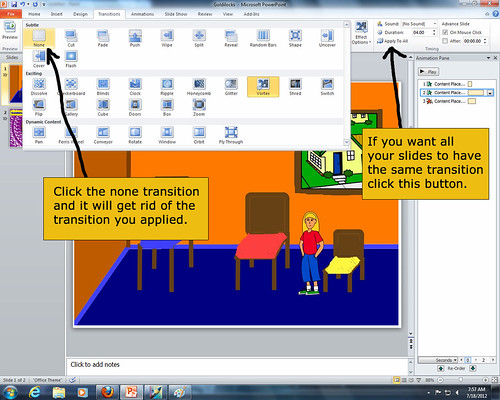
4) You can get rid of the transition by clicking the none option. You can also apply the same transition to ALL the slides by clicking the 'APPLY TO ALL' button:
PPTransition4

After about 2 days of playing on PowerPoint, students were ready to share their final projects. It was really cool to see what they created.

I hope you found this helpful and I look forward to sharing more of my teaching experiences with all of you in the future.

What are you waiting for? Go create a PowerPoint of your own!
Brittany

Wednesday, July 18, 2012

Goldilocks and the Three Bears

The second half of my Fun with Technology consists of a project they started the first day and are just finally finishing this week. This project is based on the popular story Goldilocks and the Three Bears. I am assuming most of you are familiar with it, but for those that aren't here is just an overview of the story.

Goldilocks is a little girl who loves to walk in the woods and pick wild flowers. One day she wanders too far and gets lost. She happens upon a cottage that belongs to the three bears, however she does not know that. She knocks on the door and when she finds the door open she wanders inside. Once inside she eats porridge from three bowls. The first is too hot, the second is too cold, and the third belonging to the baby bear is just right so she eats all of it. Next she goes into the living room and finds three chairs. One is too big, one is too wide, and one is just right but breaks. Finally, she wanders into the bedroom. She lays in each bed, but only the third is just right and she falls asleep. While sleeping the bears come home and find their porridge eaten, chairs sat in, and find Goldilocks in baby bear's bed. At this point Goldilocks awakes screams and runs out of the cottage never to return.

The first step of this project was for students to illustrate the story. Students used Pixie which is a fun illustration program much like paint, but a lot fancier. I taught students how to add stamps and use some of the different tools. Each day they had another part of the story to illustrate. This part of the project took much longer than I expected. This is partially due to the fact that many students do not come to school every day. So, they get behind and need a day or two to catch up. The illustrations were finally done by Wednesday last week and we started on the PowerPoint presentation on Thursday and Friday.

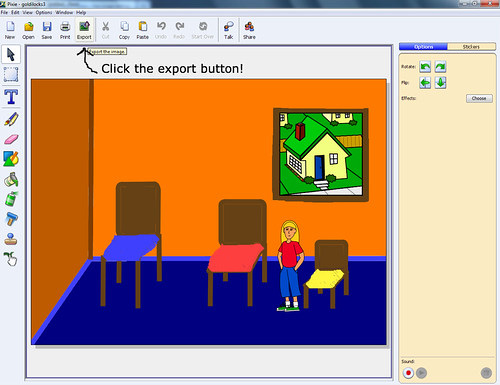
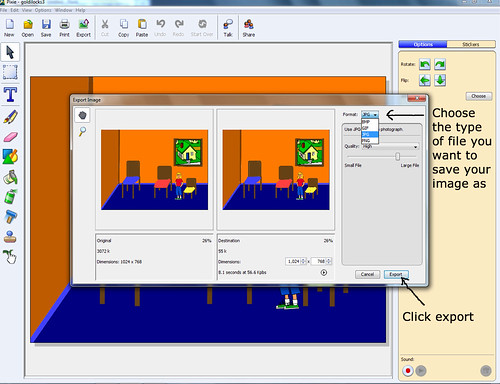
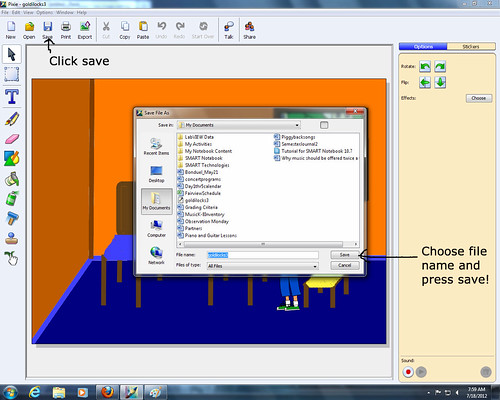
In order to put the images onto PowerPoint I learned that you must export the images. In most image editors you can just save the image as a JPEG or PNG so that is can be uploaded on PowerPoint. However, in Pixie it automatically saves the image as a Pixie image. There are no other options. However, if you are looking to save something as a JPEG in Pixie, here is how!

1) Open the image you want to save in Pixie

2) Click option that says EXPORT:


3) Choose the type of file you want to save the picture as and then click export:


4) Save your file: (I had my students save it as the exact same thing they saved their other image as. It will not save over your original since it is a new format)


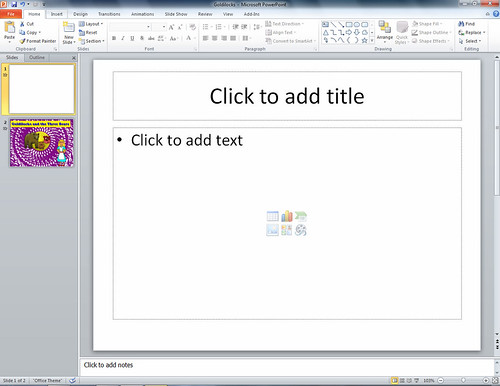
Once it is saved as a JPEG you will be able to upload it into PowerPoint and here is how:
1) Open a new PowerPoint presentation:


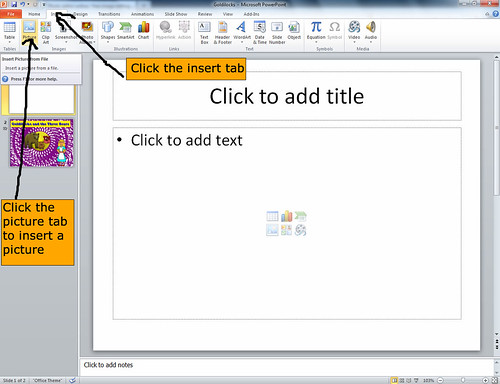
2) Click the insert tab (this may not be an actual tab if you are using an older version of PowerPoint this image is from PowerPoint 2010)
Click the picture icon:


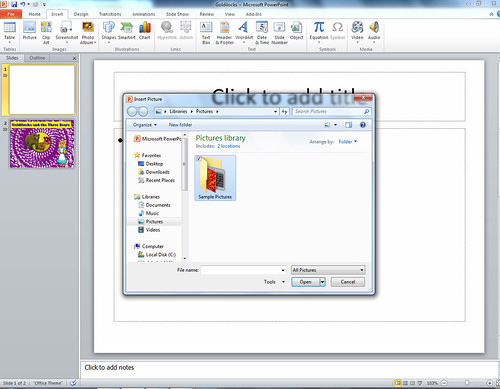
3) Browse for the image you want:


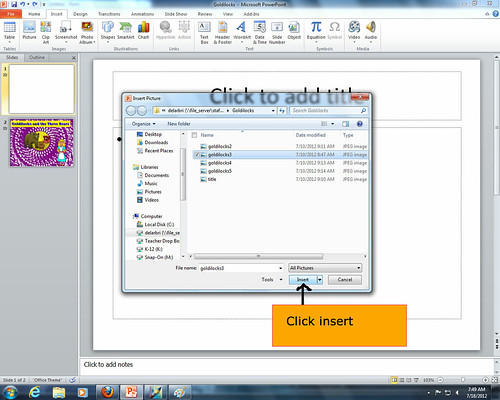
4) Click insert and it is now in your powerpoint:


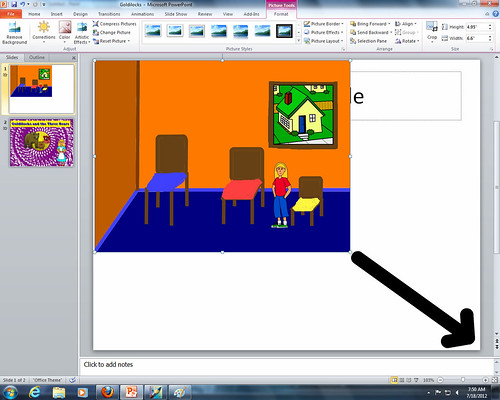
5) You can use the small squares to make the image bigger or smaller:


My students inserted all 8 pictures of the story into their powerpoint before beginning the editing process.

The 8 pictures for this project were:
Title Page
Goldilocks gets lost and finds a cottage in the woods
Goldilocks tries the porridge
Goldilocks sits in the bears chairs
Goldilocks tries the bears beds and falls asleep
The bears come home and find their porridge eaten
The bears find their chairs sat in
The bears find Goldilocks taking a nap in baby bear's bed

Remember, it is great to get students to really think about the environment of the story. When they are illustrating don't just let them illustrate the objects like all the bowls. Have them really imagine what the kitchen of a bear's cottage would look like. Does it have wood floors? Linoleum floors? What color is the walls? Do they have wallpaper or paint? Maybe they are also wood... Really let them use their imagination and put details into their story.

Miss De Laruelle