Image Map
Showing posts with label Preparation. Show all posts

Tuesday, July 21, 2020

Lesson Plan Template Tutorial - Lesson 2

Last week I posted how I use Powerpoint to display my lesson plans each day along with directions on how to do it yourself. Today, I'll share how to follow this same process on Google Slides. I personally prefer Powerpoint when teaching in person, but when we transitioned to virtual learning in March I switched over to Google, since that is what all my students had access to. Having these lessons made it easy for students to follow their normal music routine, while also allowing me to include recordings, videos, and more.

If you did not see the tutorial for Powerpoint and would prefer that method you can find that blog post by clicking HERE

  1. Start with an empty slide. You'll see below that I made mine decorative and inviting, but this is definitely NOT a necessity. I started with plain backgrounds about 8 years ago.
  2. Click insert and add a text box in the blank area of your lesson plan template. You can add your lesson plan information in that area.
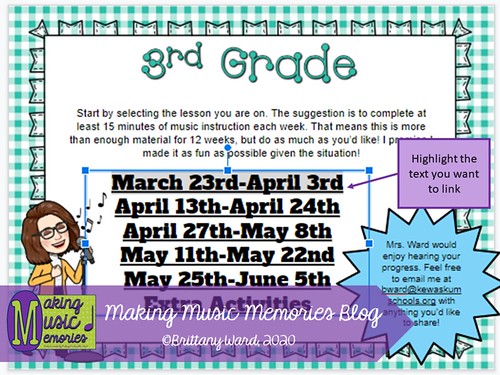
  3. When you are done entering your lesson plan information it may look something like this (minus the bitmoji and shape in the corner):
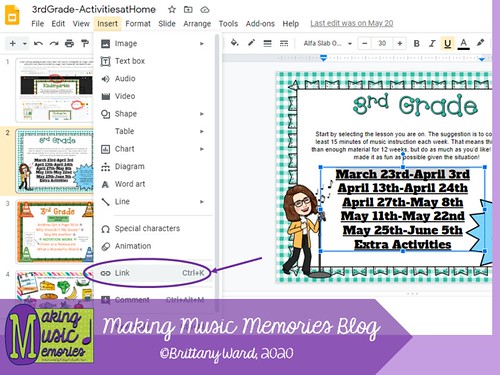
  4. Once you have your lesson plan typed up you can hyperlink text to a different file or video. In order to do this you want to highlight the text
  5. Click "insert" then "hyperlink"
    Slide5
  6. You'll receive a pop-up that allows you to enter the link to another website or click "slide in this presentation" to select a slide in your current Google Slide project.
    Slide6
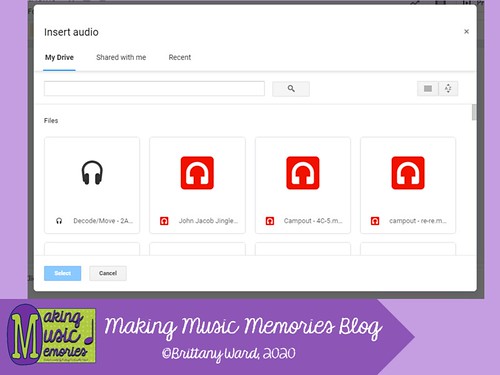
  7. To add an audio file select "insert" and then "audio". Make sure the audio file you want to use is already saved in your Google Account otherwise you won't be able to add it. You'll also want to make sure the audio file is shared to everyone with the link. Otherwise, you'll have issues with students not being able to play the song. (If you need a tutorial on this I'd be happy to do one in the future.)
    Slide7
    Slide8
  8. When you are finished you will see a speaker appear like you see below:
    Slide9
Hopefully this tutorial helps you get started.

Below is a link to my Lesson Plan Templates that I created if you are interested in using them instead of creating your own. My full version will be on SALE for the next few days. ENJOY!
Lesson Plan Templates - Full Version Lesson Plan Templates - Freebie

New-Signature-2020

Thursday, July 16, 2020

Lesson Plan Template Tutorial - Lesson 1

Years ago I wrote a blog post about how I create a tech lesson plan to project on my SMARTboard. You can read that original post HERE. Since then I have continued to do this to save time and energy and make use of every second of class time. Some ways this helps in my classroom:
  1. It provides a visual schedule for students to keep track of what needs to get done and I avoid the "What are we going to do today?" questions
  2. I can link video clips, audio clips, and even attach extra projected files with hyperlinks
  3. It is something pretty for me and my students to look at

If you do not want to start from scratch and would like some cute backgrounds to start with you can download my pre-made Lesson Plan Templates. I have a free version that provides one background for Kindergarten-5th Grade, as well as a version with multiple different backgrounds for purchase. Please note that this is NOT necessary. I personally choose to have a different background each month to keep things fresh, but you could definitely keep the same background for the whole year or even just have a blank slide. That is how I started. Links for my backgrounds are at the end of this blog post. (See below to see a picture of my title page for an April slide):
April Title Slide

Today, I will start with some of the first steps you should follow on PowerPoint or Keynote to get started. You also can do this in Google Slides and I'll put up a second tutorial with how to do this in Google Slides. I found this strategy helpful when teaching online this spring. I could send them the Google Slide lesson plan with linked videos, games, activities, audio files, etc.

  1. Begin with your blank slide that you want to list your lesson plans on. Here is an example of what mine looks like:
    Empty Slides
  2. Click insert and add a text box in the blank area of your lesson plan template. You can add your lesson plan information in that area.
    Adding a Textbox
  3. When you are done entering your lesson plan information it may look something like this:
    Prepared Slide with Lesson Plans
  4. Once you have your lesson plan typed up you can hyperlink text to a different file or video. In order to do this you want to highlight the text and click insert hyperlink.
  5. You'll get a prompt like you see below and you can click the file you see or browse for another file. When you have selected the file you want then click "ok".
    Hyperlink to a different file
  6. You could also hyperlink the file to a different slide in your lesson plan presentation. To do this click "insert", then "hyperlink", then click "place in this document", select the slide you want it to go to, then click "ok".
    How to Hyperlink to a different slide
  7. Another great use of this is to add an audio file to your presentation. I like to do this for adding folk dance music, beat motion songs, or a piece of Classical music we will be listening to. Not matter what you want it is simple to add. Click "insert", "audio", select whether you want something from your computer or you are recording it yourself, then click "ok".
    Adding an Audio File
  8. When you are finished you will see a speaker appear like you see below:
    Audio Added
Hopefully this tutorial helps you get started. I will create another blog post soon to give directions on how to do all of this on Google Slides for those interested in using Google Slides instead.

Below is a link to my Lesson Plan Templates for download on my Teachers Pay Teachers Store. My full version will be on SALE for the next few days. ENJOY!
Lesson Plan Templates - Full Version Lesson Plan Templates - Freebie

New-Signature-2020

Sunday, March 15, 2015

Preparing High & Low

I'd love to share some of my new (and old) activities for working on high and low with my students. This has been an extremely difficult concept for my Kindergarteners to understand, but this year I had every Kindergartener receive 100% on our assessment of opposites. (Which includes one question for loud/soft, one question for high/low, one question for fast/slow, and one question for long/short)

This year I got some fresh new ideas from many colleagues on the Facebook General Music Group. It is so great to collaborate with so many other music teachers and bounce off ideas. It was from this conversation that I received some ideas of new ways to teach this concept.

Vocal Explorations
Before I even talk about high and low, I work a lot with students on singing in their high and low voices. This includes having students match the pitch of a slide whistle I play for them. Saying phrases like 'mmm' going up and down with their voice. Plus, we do a lot of vocal explorations on the SMARTboard. The vocal explorations are my favorite to create and use in my classroom. If you aren't familiar with vocal explorations they are pictures with hills and lines showing the way students should sing. Students follow the image using their voice. They sing in their high voice when the line is toward the top of the picture and use their low voice when it is at the bottom. We normally have to practice a couple times before we really start to get good at it. One of the most common mistakes I get is when students just repeat the first image over and over again. I then remind them to look at the way the line is different and work on singing what it shows. Another common mistake is that students always want to end in their high voice. It helps when I point out before we start: Are we starting in our high or low voice? Are we ending in our high or low voice? Then I correct if students don't sing it correctly.

Here are some images of what vocal explorations look like:
ValentineVocalExploration1
ValentineVocalExploration2 Slide2 Slide6 SpringVE2

Note that some have lines and others are empty so your students can draw their own on your interactive white boards.

You can find a wide variety of these in my Teachers Pay Teachers Store:
Vocal Explorations
-OR-
You could create your own using Powerpoint.

If you aren't sure how to create your own Vocal Explorations and would like to learn more about how to do this please leave a comment on my facebook page or in the comments to let me know. I'd be happy to blog about how you can create your own (if there is enough interest).

Tuesday, November 19, 2013

2/4 Tuesday - Concert Costumes & Color by Solfege

I have begun to love Tuesdays, just because of the 2/4 Tuesday linky party hosted by Steph!


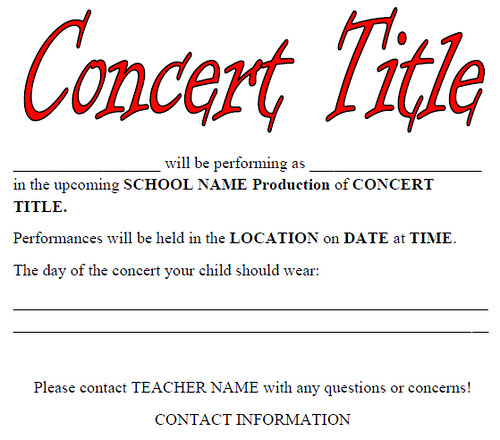
As promised, last week, I am going to talk about how I let parents know about costuming for my concerts. After picking students for speaking parts and thinking about what I am capable of supplying for concerts and what I am not, I can let parents know what their child should wear for the upcoming concert. The sooner I can let parents know, the more prepared they can be. I hate burdening parents with costuming, but sometimes it is just not possible for me to supply all elements of the costumes.

In order to make it simpler for me and for parents, I send home slips with students about when the concert is, what part they are playing, and what they should wear for the concert. Here is my template that you can alter for your own use:

ConcertInfopic
(Click the picture above to be brought to the dropbox file)

For more concert tips check out my other 2/4 Tuesday Posts - Preparing Students for Try-outs, Try-Outs, & Picking Speaking Parts

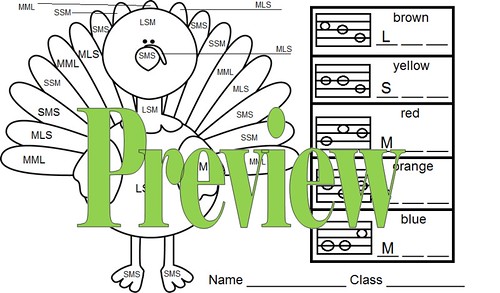
My latest work has been on creating Color by Solfege worksheets. I needed a fun way to get my students to continue practicing their solfege even during the Holiday Concert season. My little ones (2nd Grade-5th Grade) have really been enjoying this and are very excited to color the sheets next week.

turkey_solfege_colorpage_preview

If you like the Color by Solfege worksheet you should make sure to like my Facebook page HERE. I will be participating in a Facebook Frenzy through Teachers Pay Teachers the beginning of December and I will be giving away at least one Color by Solfege Christmas/winter worksheet.

Tuesday, November 5, 2013

2/4 Tuesday - MSOTM, Rockin' Behavior Update, & More Concert Prep

Yay! Time for another 2/4 Tuesday!


1) Music Student of the Month
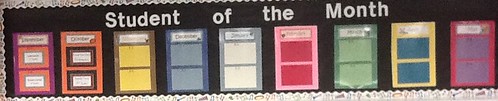
With October over it is time for me to update my Music Student of the Month bulletin board at Fairview Elementary.
sotm


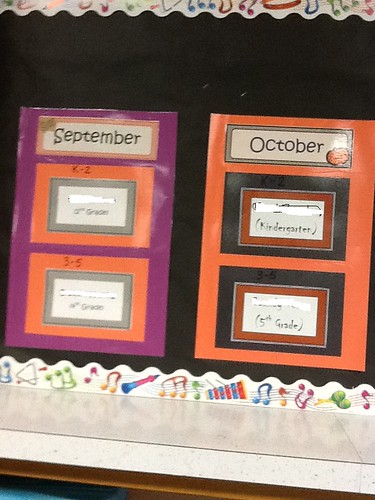
As you can see from the picture, I have a poster for each month of the school year and two spaces. Since I teach at a small school (one of each class Kindergarten-5th Grade) I pick one Kindergarten-2nd grader to get featured and one 3rd Grade-5th Grade student. At the end of the month I post their name under the month and at the end of the year they get a special Music Student of the Month certificate for the month they were featured. It is a fun way to recognize individual students that are going above and beyond expectations on a regular basis.
sotm2


If you do something similar and are looking for fun awards for each month of the year, I will be putting together a bundle of my Student of the Month decorations and awards later this month. You can watch for an update in my Teachers Pay Teachers store or back here on my blog.

2) Rockin' Behavior Update
As you can see in my prior post, here... I have been using a Rockin' Behavior clip chart to motivate my students to work hard in music class. It has been working really well so far and I have already had my reward 'parties' for about three classes. Now that it is getting farther into the year some of my classes have earned five stickers on their clips already! This means they have made 5 'tours' to the top of the behavior chart! For showing such excellent work in music I have created a bulletin board (it is actually the back of a door window) that displays these classes filled clips. After their clips get added to the board their class gets a new clip and they start the process all over again.
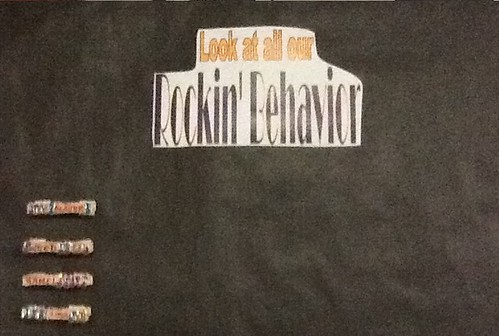
photo (8)


3) Concert Try-outs 'Rubrics'
I discussed in my last 2/4 Tuesday post that this week is try-outs for Holiday Concert speaking parts. This is always a difficult part of having Holiday plays (as I'm sure most of you know). Now that I'm doing try-outs for my fourth year now, I feel like I finally have a process and guidelines that work for me. This is how my try-outs are set up:
  1. About a week beforehand I prep students for the process and send home slips about the try-out process. (To read more about that go here)
  2. During music class I have students in small groups go up and perform the part they practiced on their own.
  3. I score students on the following three things: voice volume/tone quality - do they speak loud enough and clear enough, do they speak slow enough, etc, theatrical ability - do they show emphasis in the way they speak and are they willing or able to take cues from me, and reading fluency - this is also where I pay attention to if they practiced. Obviously you can't guarantee this but it is normally clear by the way the student reads and delivers their lines if they took time to look at them or not. This is NOT about how good of a reader the student is, just that they deliver the line as though they are good readers.
  4. I rate students by giving them a 1, 2, 3, or 4 in each category.
  5. If students have to sing a solo for the part they are auditioning for I have all students auditioning sing all at once. I can normally switch them around so I can hear each individual voice. They again get rated in two categories: tone - sing with a clear tone and good quality, notes - just meaning they follow the notes pretty well and are singing in tune.
  6. After all my students are 'rated' it is time to plug in the numbers and pick my parts.

I will discuss how I go about picking parts in my next 2/4 Tuesday post. However, to help you all out I am linking to the rubric I use for my try-outs HERE. Feel free to tweak it to your own delight! Please let me know how you audition for parts or choose parts. I am always looking for new ways to do things.

Tuesday, October 29, 2013

2/4 Tuesday - Halloween Rap and Concert Prep

It is Tuesday again, which means 2/4 Tuesday! This has been a rough day for me, so this is probably the best part of my day.

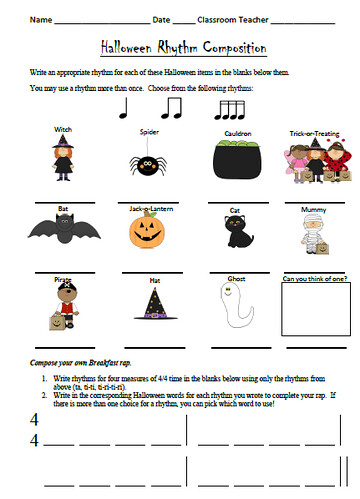
1) Halloween Rap Using Ta, Ti-ti, and Ti-ri-ti-ri:
halloweenpicture

My 3rd graders used their new knowledge of ti-ri-ti-ri to create their own Halloween Raps. This is very similar to the freebie I offered here, but this one adds in ti-ri-ti-ri (you can get just this worksheet for free --->here. Please rate it if you get a chance!). My students got one half hour period to work, plus 15 minutes a second day. At the end of the day my students got to share their compositions for the class and they had a great time!

2) Holiday Concert Try-Outs:
It is hard to believe, but I started Holiday Concert prep on Monday. It may seem far off, but when you only see some of your classes once a week you have to start early. I started this week by introducing the music and talking about my try-out process. Try-outs will be held next week and students that want a speaking part must prepare for try-outs by taking home the one page script I sent them home with. Then, next week, I pick students to read their part aloud for the class. I'll discuss more about my try-outs next week, but for now I'm sharing the short letter I send home to parents about my try-out process. I try to make it clear what I look for from each student during try-outs. You can download the file by clicking the link below:

Holiday Concert Try-Out Letter

3) Holiday Concert Smartboard Files for Kindergarten and 1st Grade:
smartboard1smartboard2
smartboard3smartboard4
smartboard5

3 years ago, I started to make Smartboard Files with pictures for my little ones. This helped my students who could not read, by being able to connect the words through pictures. The Kindergarten teachers and 1st grade teachers at one of my schools really enjoy these and ask for them each year. One teacher in particular said that it really makes it easier for her, and the kids thought it was awesome that she had the same file I do. You can see a few picture above of what this sort of looks like. (Clip art used in this file is from My Cute Graphics.)

One final note:
My Halloween Freebie was such a hit that I decided to put together a bundle for Thanksgiving. If you liked the Halloween bundle you will definitely like this one! This bundle will be free for the next week (until 9:00 pm Tuesday, November 5) after that it will be $3.00 so make sure to take advantage of this offer now! You can get the bundle here.

Have a terrific Tuesday!