Image Map
Showing posts with label grade 6. Show all posts

Saturday, September 8, 2012

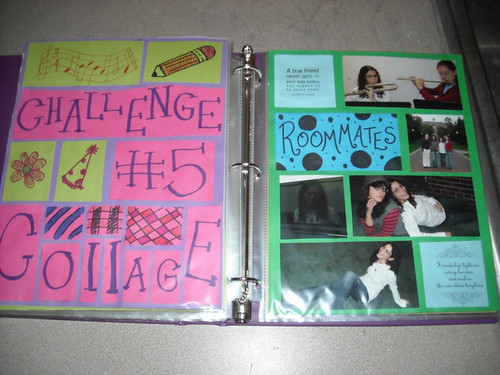
Challenge #5 - Collage Technique

Guidelines:
  • You need to create ONE scrapbook page for this challenge (Remember: one page is the two pages side by side)
  • Create a collage of photos on either side of your scrapbook page. This collage needs to contain AT LEAST 5 pictures.
  • You may only use 5 stickers, stamps, punches, etc. for this challenge. (Remember the focus is to use a lot of pictures, not a lot of ‘stuff’)
  • A journal is allowed, but not a requirement.
  • Use at least 8 pictures for this page. If you do not have enough pictures make sure to get some for this page!
  • Remember to make your page neat and clean!

Tips & Tricks:
  • Measure, measure, measure! The pieces of paper most of you are working with are 8 ½”x11”. Measure your pictures to fit into that.
  • Use a ruler and be careful NOT to cut your pictures until you are completely certain you are right. You can always cut more off later, but you can NOT put it back on once it is off.
  • Do not worry about titles, stickers, etc. until the VERY end. You may not even have a title. That is alright! The focus this week is the pictures!
  • Be creative in how you put the pictures together. Use the templates provided on your table for ideas and inspiration.

For this challenge I gave my students a set of templates which I took from this website-->Scrapbook, Etc.<--
This helped students create their own layouts or cut pictures to fit the given layout.

Challenge Points:
  • Creativity
  • Follow Directions
  • Teamwork
  • Time Management
  • Neatness

My Example:
Challenge #5 - Collage Example

Winner of Challenge #5:
Challenge #5 - Collage

Thanks for Reading!

Challenge #4 - 'Themespiration'

Guidelines:
  • Create ONE scrapbook page for this challenge (Remember: one scrapbook page is actually two single pages side by side)
  • Decide on a theme for your page and have at least 3 things on your page that help represent this theme (this does not include pictures!). At least one of these things should be made by you! More will result in more points! This is your chance to be artistic!
  • There is no limit on the amount of stickers, punches, or stamps you can use for this challenge, but keep in mind you do NOT want your page to look cluttered. Make your hard work stick out!
  • A journal is welcome, but not a requirement for this challenge.
  • Remember, that, if you choose to title your page it should be neat and clean.

Tips & Tricks:
  • Choose a theme first! Remember you do not need a lot of pictures for this theme (2-4 will be plenty). However, you want to decide what you are going to create to make this theme come alive. Take a look at the examples in my binder to help you get started!
  • Spend the majority of the time, the first day (and maybe even second day), creating your theme items. These should be neat, clean, and be using your best artistic skills (some have more skills than others, that is okay! Just do YOUR best!)
  • Find a way to have your theme items really stand out and do not add a lot of clutter that takes away from the items you created for you theme.

Challenge Points:
  • Creativity
  • Follow Directions
  • Teamwork
  • Time Management
  • Neatness
  • Items for Theme

My Example:
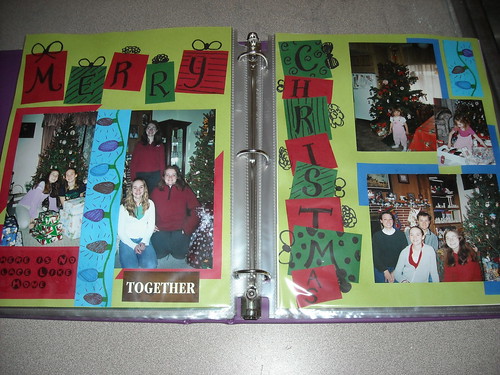
Challenge #4 - Themespiration Example
Notice the Christmas Presents creating the words Merry Christmas. This is one of the items I created to represent the theme.

Winner of Challenge #4:
Challenge 4 - Themespiration

Thanks for Reading!

Thursday, September 6, 2012

Challenge #3 - Ripping Technique

Guidelines:
  • You need to create TWO scrapbook pages for this challenge (Remember: one page is the two pages side by side, so you are really creating four single pages)
  • Must using the ripping technique at least twice on each page. Using it more is recommended. Keep in mind that you want to rip towards yourself to make the effect obvious!
  • Can only use a combination of 15 stickers and pictures.
  • A journal is suggested, but not an expectation. You can decide whether you want to include one or not. However, keep in mind that you will probably get additional points for adding a journal to your page.
  • If you choose to title your page remember to make it look neat and clean!

Tips & Tricks:
  • When ripping you should rip towards yourself. If you forget, just turn the piece around.
  • LAYER: sometimes rips in front of pictures sometimes pictures in front of rips.
  • Cardstock (heavy paper) works best for ripping. Lighter paper may not show the nice rips. Because of this it may be smart to use the lighter paper as a background and the solid cardstock as your ripping paper.

Challenge Points:
  • Creativity
  • Follow Directions
  • Teamwork
  • Time Management
  • Neatness

My Example:
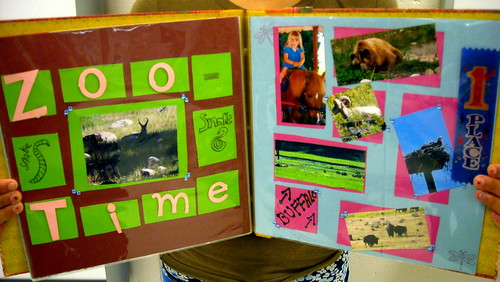
Challenge #3 - Ripping Example

Winner of Challenge #3:
Challenge 3 -  Ripping Technique

Thanks for Reading!

Wednesday, September 5, 2012

Challenge #2 - Geometric Shapes

Guidelines:
  • Pick a geometric shape as inspiration for your design. Some examples of geometric shapes include circles, parallelograms, squares, rectangles, triangles, trapezoids, octagons, hexagons, pentagons, stars, hearts
  • Title your page using stencils, nice printing, or stickers
  • Must use at least 10 of the shape of choice (Keep in mind, this does not mean one star, one heart, one circle, 3 squares, etc. Instead it means if you choose a triangle you use 10 of them in your scrapbook page)
  • Can only use a combination of 10 stickers and pictures
  • Must include a journal. This journal should have something to do with the page, but is NOT the description of pictures. Instead, it is a reflection on something. For example: if you have pictures of a vacation you could journal about what you did that specific day.

Tips & Tricks:
  • Before you do anything you should choose the shape you are going to use.
  • Cut out several shapes of various sizes and start to arrange them on your page. DO NOT glue them down right away.
  • Arrange pictures and a short journal around the shapes. Layering some shapes over pictures and some under will give it a more exciting look.
  • Make sure your shapes fit with the color scheme of paper. For example: if you pick a patterned paper that has a lot of orange, yellow, and red you should probably cut out shapes that are similar to this color.

Challenge Points:
  • Creativity
  • Follow Directions
  • Teamwork
  • Time Management
  • Neatness

My Example:
Challenge #2 - Geometric Shapes Example

Winner of Challenge #2:
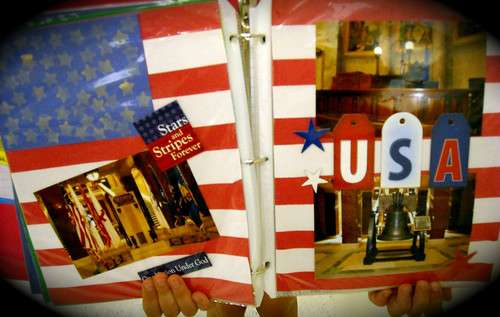
Challenge 2 - Geometric Shape

Thanks for Reading!

Tuesday, September 4, 2012

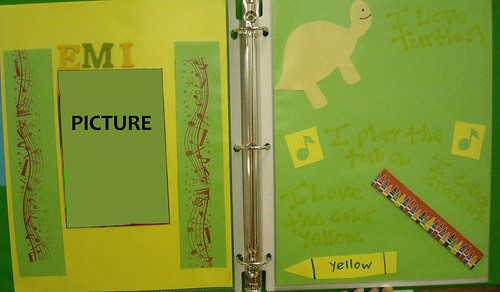
Challenge #1 - Creating a Pattern

The third class that I taught during the summer was a Scrapbooking class. This class was by far my favorite to teach. I was a little worried going into it that students would not actually practice the techniques that I taught them. This was something I was warned about by the current art teacher. To solve this dilemma, my friend E came up with a brilliant solution: Scrapbooking challenges! I created five different challenges to go with the five different techniques we worked on throughout the summer. Students then worked on these challenge pieces and turned them in after a certain amount of time.

For each challenge I created PowerPoints with guidelines, tips & tricks, and challenge points (what they are 'graded' on).

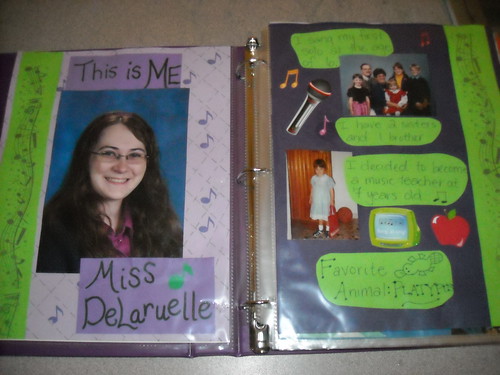
The first challenge was creating a pattern that somehow represents yourself. The guidelines for the first challenge were as follows:
  • Create a pattern using stamps, markers, pens, etc. that somehow represents you
  • Must use AT LEAST ONE stamp
  • Use at least one picture of yourself
  • Include at least 4 interesting facts about yourself on the page
  • Can only use a combination of 10 stickers and pictures

Tips & Tricks to help students with the challenge:
  • Only have two to three focal points (things that REALLY catch your eye)
  • PLAN, PLAN, PLAN!
  • Focus on the pattern FIRST!
  • Pick colors that allow the pattern to stick out

Students were 'graded' on the following Challenge Points:
  • Creativity
  • Follow Directions
  • Teamwork (Working with those around you and helping them)
  • Time Management (Working hard and using the time given to make a great product!)
  • Neatness

My example:
Challenge #1 - Pattern Example

At the end of 3 work days (50 minute classes), students turned in their work. I looked through all the work and added the points up. I then chose one winner to receive a bookmark and have their picture taken with their work. I also chose a team winner. The team was based on an average of points based on the number of teammates. It was amazing how excited students got about this after the first challenge.

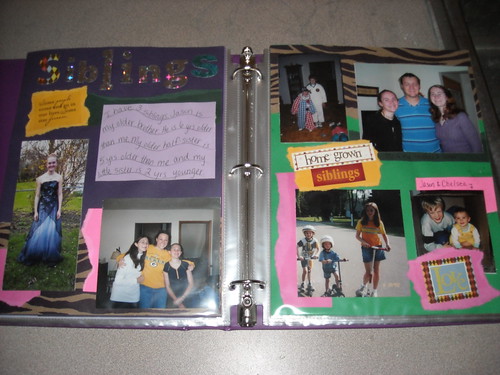
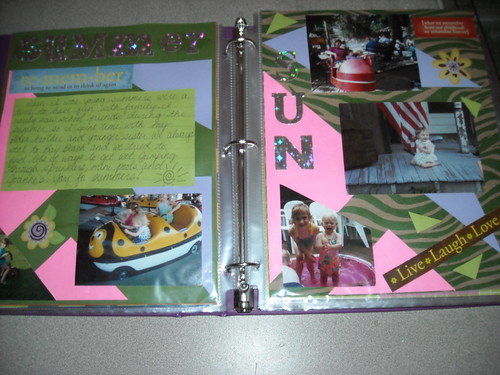
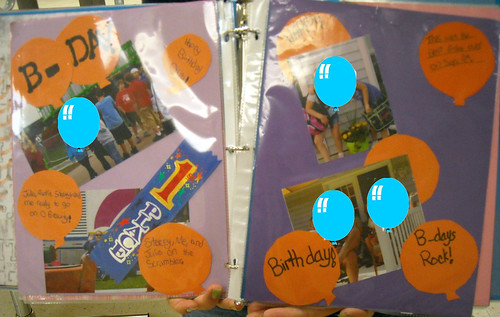
To see what great work my students came up with, I will post the winning pages of each challenge. Keep in mind these pages were created by 8-11 year olds. I also have put images in front of pictures to keep my students identities a mystery.

Here is Challenge #1 Winner: Challenge 1 - About Yourself

Thanks for reading!

Monday, September 3, 2012

Fun in the Sun - Week 4 & 5

Week 4 Events:
  • Bochee Ball
  • Lightning (Basketball)
  • Relay Race
  • Scoops in the Hoop

Week 4 Teams:
  • Chad
  • Chile
  • El Salvador
  • Italy

Week 4 we played a mix of games. First, I had two teams play Bochee Ball while the other two teams played a game of Lightning, and then they switched.

I also had them run a relay race with batons and then finally played a game that I just called Scoops in the Hoop. This is a really fun, but challenging game that students really enjoyed. Each student has a scooter they must stay on the entire game. Each team gets a laundry basket as their goal. Many waffle balls are put in the center of the court and each student has a scoop. As soon as the game starts all the students roll to the center and try to get as many balls into their laundry basket as they can. No stealing balls out of the other teams basket and no puppy guarding. Whichever team gets the most balls in their basket, when all the balls are gone, wins the game.

As a fun way to end Summer School, we had water fights 3 of the 4 last days of summer school. The last day it was a little rainy, so we ended up watching a movie instead.

Friday, August 24, 2012

Fun in the Sun - Week 3

The third week of summer school was the week of July 4th. Since July 4th was on a Wednesday this year we had school Monday, Tuesday, Thursday, and Friday. This meant relatively low attendance for the entire week. Plus, having July 4th in the middle of the week meant some took Monday-Wednesday for vacation and some took Wednesday-Friday off.

Due to low numbers I only created two teams this week:
  • Peru
  • Russia

We started off the week with a game of soccer. I was surprised how many of the kids didn't know how to play soccer. Apparently it is one of the few sports they don't have leagues for here. However, I myself grew up around soccer so I am convinced that it is a great sport! I explained the rules and students played a game of soccer.

To go with the soccer game, they played the second day, they had a relay race where students had to dribble the ball between the cones. Many didn't actually dribble it, but I ended up counting it since none of them seemed to know how.

To add to the low attendance, Wednesday, Thursday, and Friday were EXTREMELY hot! This meant some students didn't come to school because they did so much outside in the heat they were exhausted and stayed home on Thursday and Friday.

To deal with the heat I decided to come up with some fun water games to play. I ran to the Family Dollar on Wednesday and bought some supplies. I bought some spray bottles, five gallon buckets, sponges, and plastic cups.

July 5th, I only had 3 students show up for class. I had one of my students fill up both of the 5 gallon buckets of water. We brought them outside and played a water relay game. Since there was only 3 students (2 boys and one girl), we decided to have a relay of boys verses girls. We set up the two 5 gallon buckets next to each other and put two other 3.5 gallon buckets about 5 meters away. Each team got a sponge and the first person ran from the 3.5 gallon bucket to the 5 gallon bucket. Once at the 5 gallon bucket, the person dunk the sponge in the bucket full of water and ran back to the 3.5 gallon bucket. Then the team member squeezed the water into the empty bucket and handed the sponge to the next person on the team. Continuing this process for either a certain amount of time or until one team gets to a certain measurement on the bucket.

After the water relay we had a massive water fight where I, of course, got drenched.

The last day of the week we finished off with some 'target' practice of sorts. One of the teachers made a target station using pool noodles. You can learn how to make this game here. My students really loved this and we ended up playing it again the next week.

Thanks for reading!

Tuesday, August 21, 2012

Fun in the Sun - Week 2

Week 3 Featured Countries
  • Brazil
  • Egypt
  • New Zealand
  • Norway

I learned from the first week that I needed to be the one putting together teams. This way I could make sure that teams were even and fair. Each week this proved to be rather difficult. I did not want the same students together over and over again and I wanted students to feel successful. Unfortunately, when a team was losing often everyone on that team gave up! :( This was extremely frustrating to me as a teacher and I did not know how to deal with it. I just kept trying to remind students that you can't give up all the time.

This weeks events were the following:
  • Ultimate Frisbee
  • Obstacle Course
  • Buddy Walkers

I was really excited about Ultimate Frisbee. The first day we were missing lots of students so I ended up playing Ultimate with the kids. I didn't do terribly, but I kind of warned them ahead of time that having me on their team did not mean they were going to win. However, I was proud of the fact that I caught 3 of 4 passes thrown my way. Not too bad for a music teacher with little athletic ability!

Overall, students did rather well with Ultimate Frisbee. In fact the gym teacher told me she was really impressed to see how well all the kids were doing with it. She said she will have to try playing it with some of the older kids next school year.

The obstacle course was also rather interesting. I set up 2 matching courses. It started with 6 hula hoops right next to each other, followed by a scooter, and about 10 meters away I added a cone with a bean bag placed by it. 5 cones were set up about 2 meters apart and then two cones symbolizing the finish line were set-up 10 meters from that.

Instead of forming a long line it was set up in a square, one obstacle on each side of the square. The fun thing about obstacle courses is there are LOTS of different obstacles you can create and many different set-ups, as well. I set it up so each member of the team had to go through the obstacle course as fast as they could. The team with the quickest time won. (I timed them using my i-Pod.) However, I added 2 seconds for every penalty they got (for not following the rules). Since there were four teams and only two obstacle courses the teams not playing at the time would work to re-set the course as people went through. For example, one person would bring the bean bag back to its start point, one person would direct the next member to go when their teammate reached the finish line, etc.

As, I stated earlier you can have fun creating your own course, but if you are wondering how to do my course here is what the obstacles were:
  1. Students stepped into the hula hoops bringing them over their head and then placing them on the ground. Then they step into the next hula hoop and continue through all of them.
  2. Students must SIT on the scooter and push it to the cone without getting off the scooter. If they fall off they must get back on before continuing to the cone.
  3. Students put the bean bag on top of their head and balance it while going AROUND the cones. If the bean bag falls off they must pick it up before proceeding on.
  4. Dash to the finish line!

Students complained when first told what the obstacles were, but it was apparent once they got started that they had a lot of fun!

The Buddy Walkers are two pieces of wood with strings attached. Students stay on the wood planks and hold the strings while walking together. They are quite a challenge and some did amazingly well together, while others did not.

Thanks for reading!

Tuesday, August 14, 2012

Fun in the Sun - Week 1

My second hour class for summer school was VERY different than my first class. My first hour class was obviously in the computer lab, but my second hour class was Fun in the Sun. My first hour class was students going into grades 1-3, but my second hour class was students going into grades 4-6.

The Fun in the Sun class was based on the Olympics. We did not do all the Olympic events, but we did have different countries as team names and different events that the teams would compete in. Each week we had about three events, which did take almost the entire week to get through.

The first week teams were:
  • Argentina
  • Australia
  • China
  • Germany

The events for the first week were:
  • Team Event - Kickball
  • Racing Event - Hurdles
  • Other Event - Tug-of-War

The biggest challenge of this week was picking teams. I picked teams completely random the first week. Students picked a country from the hat and that is how they ended up with teams. The problem was that everyone on Team Germany ended up being the powerhouse. They won every single game. On the other hand Team Australia had a lot of problems at the beginning of the week getting a long. All of them were good athletes on their own, but they just were not getting along. This led to students quitting in the middle of the game and the other teams not even having to try to win. However, by the end of the week they seemed to be getting along better and working together a little bit better. They even ended up winning one of the Hurdles Races and a couple Tug-of-War matches.

This first week taught me that it is very important to pick teams as the teacher rather than randomly. It leads to fairer teams and a more successful events.

Each week there were new teams and new events to compete in. This meant students had to learn how to get along throughout the week. Some did a great job right away and some took all week to get along.

Monday, July 16, 2012

Summer School 2012

There are a lot of perks to being a music teacher. One of them is that you get to know almost EVERY student in the elementary school. The only ones I do not know are the 4K students, since they do not have music class. Though it can be difficult learning all those names, I find it very important to get to know as much as possible about my students. It may seem tedious, but kids are extremely happy to know you care about them and want to know about them.

In order to get to know my students more I try to pay close attention to them even outside of class. I pay attention to what they play on the playground. I pay attention to who they play with. I try to have conversations with them about things they are interested in and try to relate to them as much as I can.

This summer, I have taken a break from teaching music and instead am teaching Fun with Technology (going into 1-3 grade), Fun in the Sun (going into 4-6), and Scrapbooking (going into 3-6). This has given me the advantage of learning even more about my students. It is amazing how I suddenly see different sides of students I worked with the whole last year.

Summer school will be over this week, but I have learned a LOT of cool stuff that I want to share with you. I have found interesting sites that you may be interested in checking out, I have learned new scrapbooking techniques and much more. This blog for the next couple months will highlight some of the things we have done in summer school that I think may be helpful for all of you.

Thanks for Reading!