Image Map
Showing posts with label grade 5. Show all posts

Wednesday, September 10, 2014

What's Happening Wednesday

I've decided to make a pact with myself and all of you that I will blog AT LEAST once a week. To make that happen, I'm devoting part of my Wednesday routine to writing a blog post.

This week is week 2 for me. (We normally start a little later here in Wisconsin.)

Here is a quick glimpse into my week:
Kindergarten
I'm still going through the music rules step by step in my classroom. I only see Kindergarten once a week at one of my schools and since I'm introducing one Rule Song a week, they won't be done with all the rules until October. It is a little sad to me that I don't get to see them all more often, but it is what it is! At my other school we are on to rule #3 and will be finishing rule #4 at the end of this week. (That is one stress of working in two different districts, it is sometimes very difficult to keep everyone on track or to remember where I am with different classes)

For my rules this year I'm using Lindsay Jervis's Rule Songs, as they came with her Owl Themed Rules. You can find them by clicking on the picture below:

Kindergarten is also beginning to work on keeping a steady beat and using their singing, whispering, and talking voices. I have not labeled any of these things yet, since it is only the second week of school, but we are starting to explore these concepts. For each song we sing students keep a beat in various ways and I often let students pick different ways of keeping the beat. We keep the beat slowly and quickly.
Songs we are singing in Kindergarten this week:

1st Grade
Now that we are in the second week of school we are reviewing some of the concepts we learned in Kindergarten to prepare for learning ta & ti-ti. I'm not yet labeling ta & ti-ti, but we are singing various songs that we will eventually learn ta & ti-ti with.

Songs we are singing in 1st Grade this week:

2nd Grade
In 2nd grade we are going to be reviewing ta & ti-ti and are currently preparing for ta-a. In order to do this I have picked out some songs that use ta, ti-ti, and ta-a. We will learn these songs and become comfortable singing them through a couple days of practice. When students are able to sing the songs on their own we will then begin to look at finding ta & ti-ti in the songs. Then later, we will work on figuring out our new note. My goal is to have introduced ta-a (and possibly ta-a-a-a) by November when we start working on our Christmas concert.

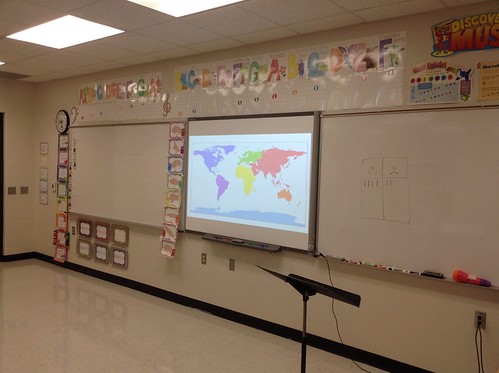
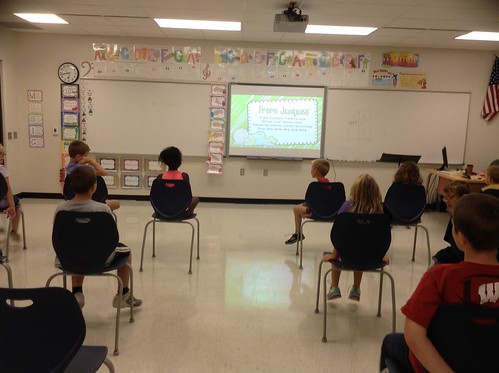
Since we are singing 2 French songs, I created a story to go along with introducing these songs by saying we were all going on a trip to France. Students had to find where France is on a map and we discussed how we would get there (plane, car, boat, etc.) This was a lot of fun. It is always great to incorporate a little bit of Social Studies into music class, as well as some global awareness.

Songs we are singing in 2nd Grade this week:

3rd Grade
Map
temp

As you can see my 3rd graders are doing similar things in music as my 2nd graders. We also looked at the map and found France. However, the reason I'm doing these songs in 3rd grade is to reinforce ta-a and ta-a-a-a. Some of my 3rd graders got to the assessment portion of half note, whole note, half rest, and whole rest, but another section didn't get to it. This will help review this concept for the classes that did assess it and prepare my other 3rd graders for assessing it.

Songs we are singing in 3rd Grade this week:

4th Grade & 5th Grade
My 4th & 5th graders ended the year after learning about ti ta ti and just beginning to look for low so and low la. I decided we would start with a couple ti ta ti songs that actually use low so and low la for added practice, since we weren't quite ready for the assessment at the end of 3rd grade. Shake the Papaya Down and Alabama Gal were two songs they learned last year that we are now reviewing ti ta ti with. When we seem comfortable with singing these songs and with the rhythm I'll start to work on the solfege for these concepts.

Along with singing my students began to learn the dance for Alabama Gal as a fun incentive for good behavior in music class. Both my 4th and 5th graders absolutely loved doing the dance yesterday, so it will be a great way to make sure we stay on task.

*NOTE: My 4th and 5th graders are around the same level because of when I started at these two schools. These classes aren't quite at the level where I would like them to be, but we are definitely getting closer every year.

Songs we are singing in 4th Grade & 5th Grade this week:

Monday, April 7, 2014

Category Rhythm Project

I'm currently working with a group of my 4th and 5th graders on a fun mini-project. We just got done learning about ti-ti-ri and ti-ri-ti, but it can be difficult to tell the difference between these two. We focused on a lot on which note gets a little bit more time. We practiced singing songs and figuring out if it gets a ti-ti-ri or a ti-ri-ti.

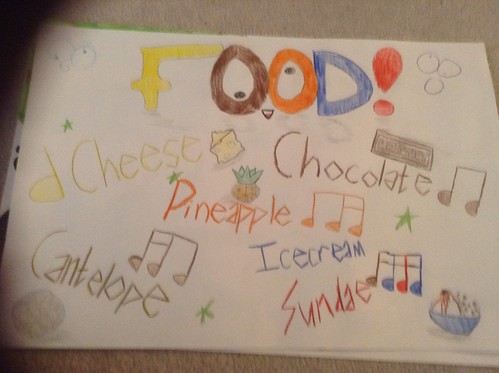
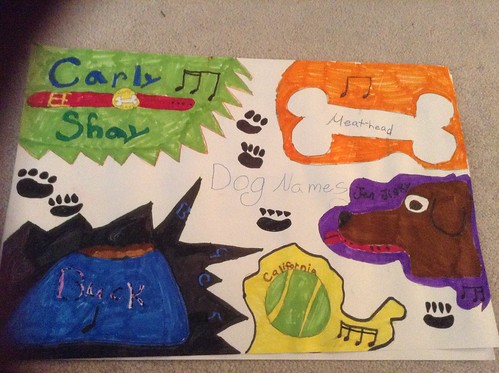
Now for some added practice I had the students split into small groups (no more than 4 people to a group and students can work on their own if they choose to). As a group they had to come up with some sort of category. It could be anything from sports to candy to states. However, once they picked their category they had to come up with words to go with each rhythm they know (1 for ta, 1 for ti-ti, 1 for ti-ti-ri, 1 for ti-ri-ti, 1 for ti-ri-ti-ri). Each word had to do with their category. I was really impressed with some of the categories students chose:
  • mythology
  • states
  • books
  • sports
  • junk food
  • fruit

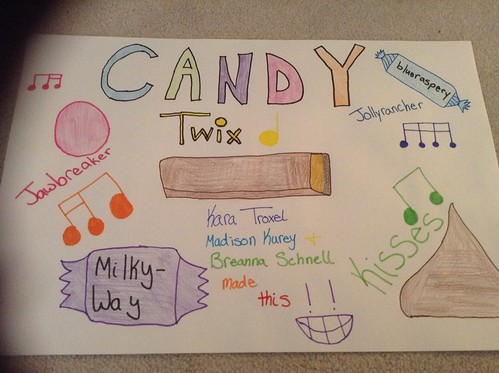
The second day, students created nice posters to go with their category and rhythms. Students were expected to write the rhythm, write the word that goes with the rhythm, and draw something to go with each word on their chart.

Here are some of the finished products:
2014-04-04 17.40.50
2014-04-04 17.40.57
2014-04-04 17.41.09

I'm really proud of their hard work. I'm looking forward to displaying these at our Spring Fine Arts night at the end of April!

Tuesday, October 1, 2013

2/4 Tuesday - Rhythm Practice


For this weeks 2/4 Tuesday I thought I would focus on rhythm practice. This time of year I review the rhythms students already know, plus I start introducing new rhythms. To go along with this I love to have games, activities, and apps to reinforce these concepts. Last year, I shared a game that I created for this purpose called Rhythm Concentration. You can learn more about that game HERE. However, here are a few more resources I have found.

Rhythm Football
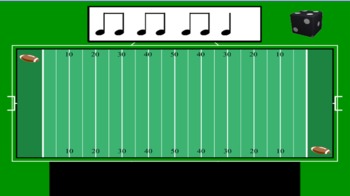
This is a fun interactive SMARTboard file that you can get for FREE at TeachersPayTeachers. I found this game last year and my students love it. I have found that any rhythm activity that includes a sport in it is a great way to get boys excited to practice their rhythms. Unfortunately, if you do not have a SMARTboard you will not be able to have access to this file.

Poison Rhythm
poisonrhythm
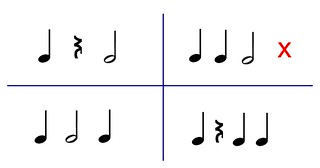
This is a simple game and quite easy to adapt to any grade and any rhythms you want to work with. You start by writing four rhythms on the board, as depicted in the picture above. Then I mark one with an 'X' (somtimes I allow the students to pick the poison rhythm instead). The 'x' represents the poison rhythm. I clap one of the four rhythms and students should echo me by clapping the rhythm back. If I clap the poison rhythm they do NOT clap. The game is set up as teacher vs. student, so when I clap the poison rhythm either the students get a point (for not clapping) or I get a point (because they clapped the rhythm - even if it is just one student!). Sometimes I have classes that do not participate or just stop clapping all of the rhythms. When this happens I tell them I get points for them NOT clapping non-poison rhythms as well. This normally solves that problem.

Rhythm Cat
Rhythm Cat is an Ipad App for practicing rhythms. It is actually kind of fun even for a teacher. How it works: Students look at the rhythm and push the green button as they play the rhythm. When they play the rhythms correctly the notes light up green and they get to move on to the next level. If they don't hold the button down at the right time or long enough, etc. the notes turn red and if they miss a lot of notes they do not get to continue on to the next level. (click the picture to find more information about it)

Monkey Drum
Monkey Drum is another Ipad App for rhythm practice. This can be just a cute app for students to create and play with, but how I use it in my classroom is for rhythm practice. At the end of a class I'll pick students to play rhythms on the monkey drum app. After they play the rhythm the monkey will play the rhythm back. This is a great way for me to assess if students can play the rhythms correctly and to assess if other students can HEAR mistakes in a rhythm. It is a very cute free app, so there is no reason not to at least check it out. (click the picture to find more information about it)

Monday, September 23, 2013

Manipulative Monday - Music Time Signature Pies


Yay! Not only two blog posts in a row, but I'm also joining my first Link Party! Music teachers are so cool! :)

Honestly, I wish I used more manipulatives in my classroom. I'm hoping reading all these posts will inspire me to actually go for it and do it. I also have to do a better job of looking out for some of those cool finds like the erasers I saw in Lindsay's blog.

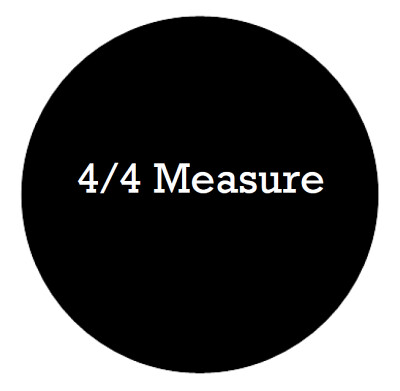
Instead, one manipulative I have used for time signatures are these music pies I created. Each pie represents a measure in 4/4 time. The black one is the filler for students to create their own measures:
meter

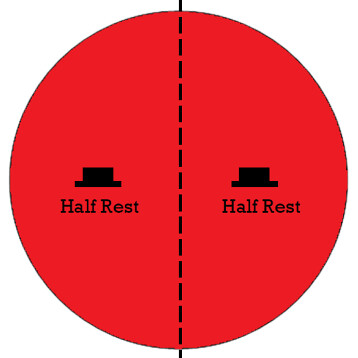
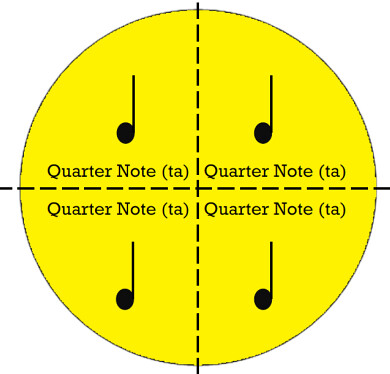
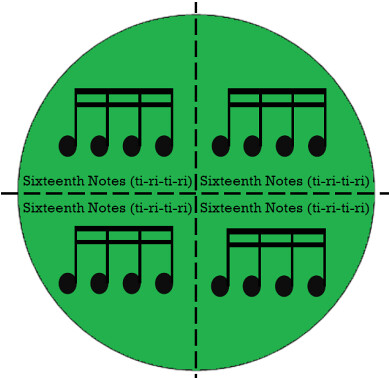
Then, I have several colored pies for the different notes my students know. I cut each one along the dotted lines so that the pieces only fill up the amount of the measure they take up. Here are a few examples of my music note/rest pies:
halfrest

quarternote

sixteenthnotes

This allows my students to create their own measures and see how they fit into the measure. This is great for kids that really need a visual or are more kinesthetic in nature. When working on a short composition students can check their work by putting the pieces together. If there are too many beats they know they have to fix something. If they have extra space in their measure they know they need to add another note.

For those that are interested they were added to my Teachers Pay Teachers Store and are completely FREE! Just print them, cut them, laminate them and you are ready to go! Please let me know if you use them and how they worked for you.

signature

Sunday, April 7, 2013

Music Jeopardy

My students LOVE music Jeopardy games. All my 3rd, 4th, and 5th grade classes ask for it and I make sure they get to play it at least once each year. It is a great way to either review information or assess students knowledge of the material. The great thing is if you create your Jeopardy game using smart notebook you can even add in short listening clips to assess students ability to hear different instruments, genres of music, etc. I created my first Jeopardy game on the smart board last year and then adapted it a bit this year. I have a Jeopardy game for Instrument Families (3rd grade), Instrument Families and their TIMBRE (4th grade), and Ensembles (5th grade).

These are the rules (I have them typed up on the smartboard file):
  1. Students will be chosen by random drawing of popsicle sticks. When your number is called you will get a choice between the categories and numbers left on the board. Once your number is drawn it will not be picked again until all other numbers on your team are drawn.

  2. Once a category and question is selected student will be given 1 minute and 30 seconds to answer. If no answer is given question is turned over to other team. (Some questions have a multiple choice option. Depicted by the multiple choice icon.)
    If a student has difficulty they can click the multiple choice option ONLY IF BEFORE time is up. – Once multiple choice options are given student only gets 45 seconds to choose an option regardless of how much time was left on the clock before and they receive half the points. (If question gets overturned the opposite team also only gets half the points as they already saw the choices.)

    ---I also say that if the multiple choice option was not selected by the original team and it goes to the opposing team for a steal the opposing team can NOT choose the multiple choice. They must answer the question without the choices.---

  3. If question is overturned due to wrong answer or running out of time a number from the opposite team will be drawn at random to steal the question.

  4. After each question regardless of right or wrong answer the opposite team will get a turn. Going back and forth ALL through the game. (The only time the same team gets 'two turns in a row' is if they steal and then it is their turn or if they get a Daily Double)

  5. Two DAILY DOUBLES are hidden in the game. If you pick one of these your entire team will get to decide how many points you are betting. There will be no multiple choice given, but the whole team will get 2 minutes to come up with an answer. If the answer is incorrect or no answer is given after 2 minutes betted points will be deducted and game will go back to regular play. Student who picked DAILY DOUBLE will get a turn to pick next category to answer on their own.

  6. Students must be quiet during the game to allow students answer questions to think. If talking name will be put on the board and if they receive one check they will have to take test version of the game, as well as, get a popsicle stick (this is part of my own behavioral system).

  7. All teammates should be positive and show good sportsmanship. If there is name calling, bragging, etc. points will be deducted from that teams total.


If you are using this to assess students knowledge or even as a review, I normally keep track of students points and what questions they pick. That way I am able to go back and see if a certain category gave students problems, if a student only picked 'easy' questions, etc.

The best part about Jeopardy is that even if a team is down by a lot of points they may still win in the end with a Final Jeopardy question.

Now I know there are many different Jeopardy games templates already out there, but if you want to see the Jeopardy games I created to get an idea of how they work or you can adapt if for you classroom, feel free to leave a comment with your contact information and I can send you the file you are interested in seeing.

Wednesday, October 31, 2012

Describing Music using Music Terminology

One of the things I'm really working on with my older students (3-5 grade) is describing music using musical terms. I explained to one of my principals that I feel this is an important skill that can really help students appreciate music in a whole new way. How cool is it when a student can pick out instruments in a pop song or describe differences in tempo. This is a skill that all kids can learn and use even if they never continue on in music.

I first emphasized this skill during our outdoor music classes (read more...).

When we went outside I had my students sing I Love the Mountains. Later, I had my students write a short reflection on the difference of sound singing outside verses inside. They were encouraged to use music words from the word wall.

Most of the reflections said things like:
  • The sound echos more inside than outside
  • We sang quieter outside rather than inside
  • There were other noises outside like leaves rustling and birds chirping
  • Our sound was much more blurred together outside

After this reflection I realized I really needed to show students HOW to use music terminology in their reflections without having to change what they are saying. In order to do this I came up with a reflection assignment students had to do for homework. (I rarely give homework, but this was a simple assignment and they were given 2 weeks to complete it)

First, I showed students some examples of reflections they wrote:
I Love the Mountains sounded different outside because it echoed less outside than inside. I also thought we sang a lot quieter outside. I also noticed that outside the music was much more blurred together where as inside it was much more disconnected.
Then, I showed them how they could just substitute a few words for music words and it still was saying the same thing.
I Love the Mountains sounded different outside because it echoed less outside than inside. I also thought we sang at a piano dynamic outside. I also noticed that outside the music was more slurred or legato rather than inside where it was much more staccato.
Finally, I gave them the assignment (this was partially an idea I was given by my school principal to also include some technology):
Students should write a short music reflection about a song that they have listened to during the month. This allows students the opportunity to listen to any song they enjoy and still be practicing writing and using music terminology. *NOTE:I even allowed non-school appropriate songs as long as they had permission from their parents. That way they could truly listen to whatever kind of music they like*

All responses were emailed to me unless they could not because of not having internet or computer access at home. I also printed out a few paper copies for these students, but they were responsible for picking them up from me.

I posted all information on my school website so students could access it at anytime. Along with this I posted: the questions they were to answer, links to music videos they may like to watch for the assignment, a word bank of musical terms to use in their reflection.

This assignment was due by Halloween and I do have to say it was such a fun experiment. I did have quite a few students that I was constantly hounding to turn in their assignment (what is new), but the responses were great! I also had quite a few students that were really excited about the assignment and enjoyed the videos I posted. It was also a great way to include technology and writing into my curriculum. (Two school goals for Fairview Elementary.)

You can see all the directions for the assignment, video links, and word bank all on my school website -->here<--. Feel free to steal the idea and even the word bank, just let me know how it works for you. :)

Happy Halloween! BOO!

Tuesday, October 16, 2012

Outdoor Music Class!

Sound Effects
Last week I decided to take all of my Fairview students outside for music classes. I decided to do this after having a short chat with a 2nd grader who often acts up in my class. He had kind of a rough day about two weeks ago and broke down in tears after music class. I asked him if he was crying because he got in trouble, to which he replied "No! I just really miss my mom!"

Fairview has an outdoor classroom that they refer to as The School Forest. At first, I wasn't sure what we should do outside. It would be easy to just go out there and sing different songs we sing in music class. However, I feel that when you are going to a new environment you should take advantage of it to the best of your abilities.

After much thought I came up with lesson plans for each class. I will introduce the ideas here with a brief description, but I'll also post more details on each project in later blog posts. This way you can get the materials I used for the lessons, as well as, see some pictures. (I don't want to bombard you with a whole week of lessons in one post!)

All my classes had to walk on the forest path in silence. While they did this they were to listen to the sounds of fall. When we reached the outdoor classroom, I then had students share what they heard. We talked about what music was and how the music of fall would be different than the music of winter. They imagined some of the sounds they may hear in the winter rather than the fall. I especially found this activity cute when one of my kindergarteners on the second day of going to the forest told the class that he heard some beautiful music on his walk to the school forest. This was without even being told to listen for music! :)

Sound Effects

In Kindergarten and 1st grade students had to find an item in nature that could be used to create music. They then shared these instruments with the class and showed them how to play their instrument. (Read more about outdoor instruments...)

2nd grade was working on a sound effects project out in the school forest. (Read more about sound effect project...)

3rd grade was finishing up their ostinato patterns, so the first day they shared their patterns with the class. The second day they did something similar to what the 4th and 5th graders did. (Read More about the Ostinato Pattern Project...)

4th and 5th graders went out the school forest and sang I Love the Mountains. Afterwards they were asked to write a short reflection on this experience. They were to describe the difference in singing outside versus inside. We then talked about what makes a good reflection and ways to describe the sound of our own singing or of instruments playing, etc. 4th and 5th graders then created their own 2 beat ostinatos with a partner, as well as, a 3 beat ostinato with their partner. Students created and practiced them the first day and then shared them the second day. (Read More about reflections...)

Overall, I really enjoyed taking the kids out for music class. I was surprised by how many of my students, that don't always care for music, were really excited about music since we were going outside. I also noticed that some of my overly rambunctious students were actually really well behaved outside.

Have a musical day!

Tuesday, October 9, 2012

Go Pack Go!

It is that time of year... Football season! Though, I myself am not a particularly devoted football fan, I spent most of my life in Green Bay, Wisconsin. This means that I probably bleed green and gold whether I would like to or not. This weekend I actually went to the Packers vs. Saints game, which made me even more excited about my latest composition project. I can't take all the credit for it, I got the original idea from a book a retired music teacher gave me. It allows students the opportunity to take chants they would hear at a football game and turn them into rhythm ostinatos! This was perfect since my grade 3-5 classes have been working on rhythms and ostinatos! :)

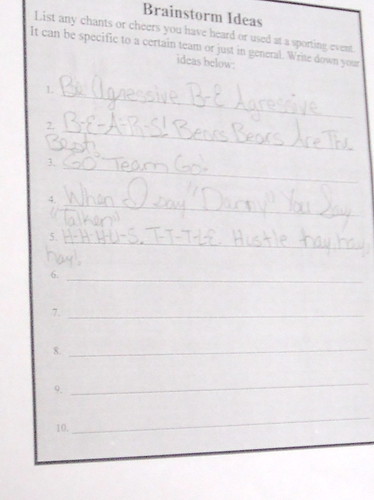
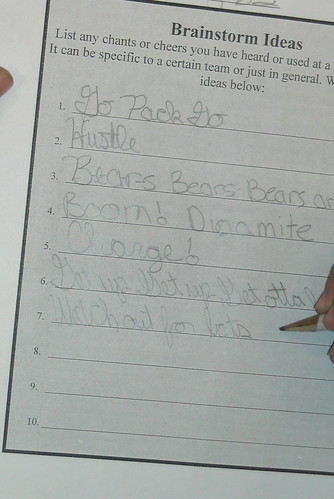
I broke this project into just two 30 minute music classes (which in my opinion is a rather quick composition project compared to some others I have done). The first day is a brainstorming day. I pair the students into groups of about 3 or 4 students. These groups then brainstorm and come up with at least 10 chants they have heard or would cheer at a sporting event. (Note: I said sporting event to reach some of my students who do not like football, but may enjoy other sports)
Ostinato Cheer Composition

The second day was devoted to writing the rhythms that go with the chants. We talked first as a class about how to figure out the rhythms. We talk about where the beat lands and how sometimes we stress different parts of a word or phrase. I give them a couple examples of my own (I chose non-sports related things so they weren't just using my examples). The groups then worked on their chants. I had the 3rd graders have 3 final cheers, 4th graders 4 cheers, and 5th graders 5 cheers. I was really impressed with some of the cheers that they created and how well they put the rhythms together. The ones that had a little bit more difficulty, or just added quarters for all of their chants, were easy to help. I just read through their chants as written and they told me if it was right or not. If it wasn't we figured out how to fix the problem together.

I found that just like with many other group activities you have those groups that get done in 10 minutes and then the other groups that work the entire 20 minutes. For this situation you should probably have some extra game or work for the groups that are done quickly. This stops students from wandering around the room or just chatting about nothing in particular.

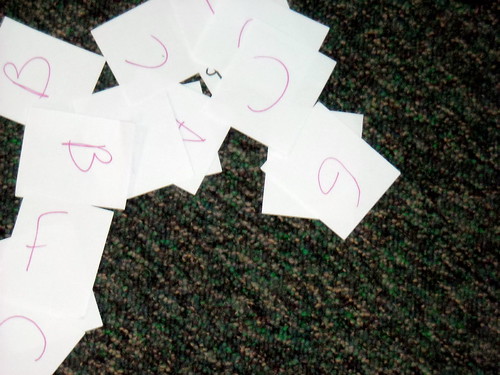
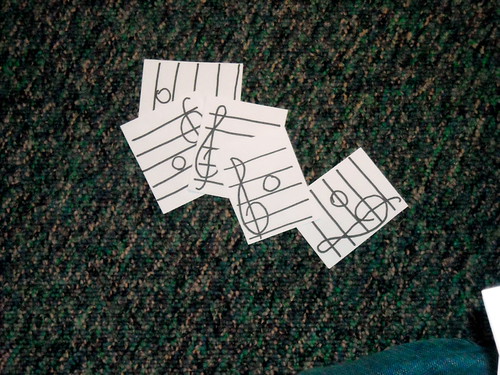
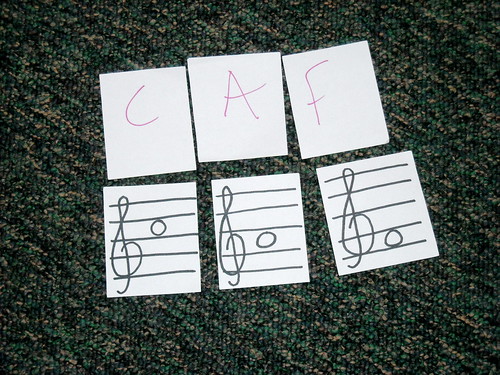
For my quick finishing groups, I created a simple game to work on for the remainder of time. Each group got a baggy with 3 sets of music letters and 3 sets of treble clef staff notes to match. One teammate would create a word using the music letters (i.e. DAD) and then the other group members would work to match up the treble clef staff notes. This way they were working on treble clef note reading without getting bored and distracting their teammates.
Note Reading
Treble Clef Notes
Writing and reading music

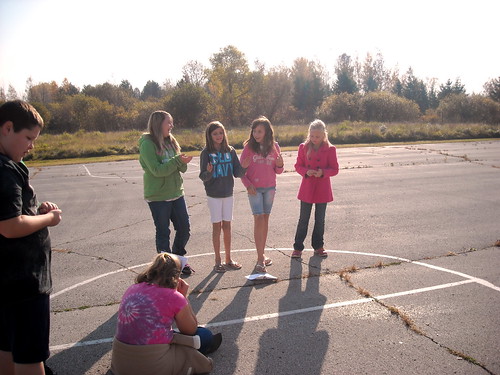
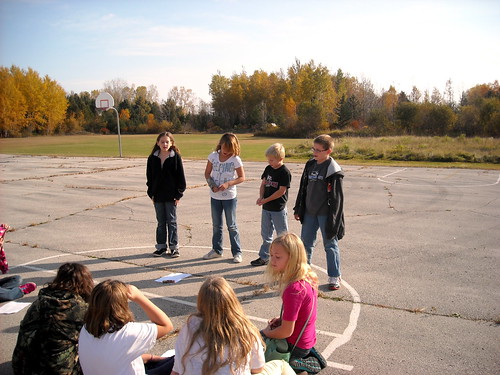
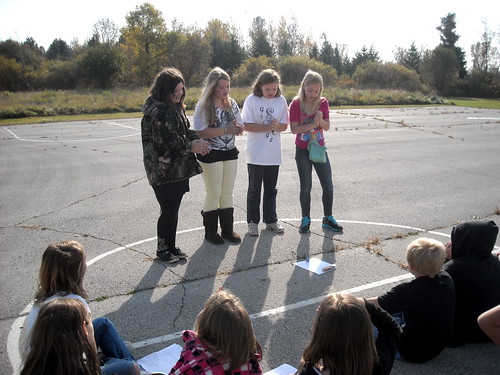
After the compositions were finished I brought students outside to share their chants with the class. I chose to go outside, not because it is particularly a loud process (though it can be) but because the snow will soon be coming here in Wisconsin and my students love being outside. That and I am really working to reach all of the multiple intelligence's in my classroom this year and one that I am particularly weak on is the nature intelligence. You will probably see more nature based lessons in the coming week as I prepare to bring my little ones outside to explore the music of the fall!
Ostinato Performance
Ostinato Chant Performance

If you are interested in this project you can get the document I created --->HERE<---

You can also use --->my rubric<--- that I created for grading the compositions.

Happy composing!

Thursday, September 27, 2012

Rhythmic Repitition

I decided after our review the first couple weeks that ALL of my classes (mostly 3-5 graders) needed to brush up on their rhythms. I wasn't sure how I was going to do this at first because it really seemed like we needed to go back to basics on this. I noticed the most difficult part for students was remembering, which note is which and how many beats it gets.

Solution? New rhythm game using quarter notes, quarter rests, and eighth notes. Once students get good at the game I'll add in other harder rhythms and hopefully get us back onto track. I call this new rhythm game Rhythmic Concentration. It was based off of a music concentration that many of you probably have heard about.

Here is how it works:

Rhythm Concentration
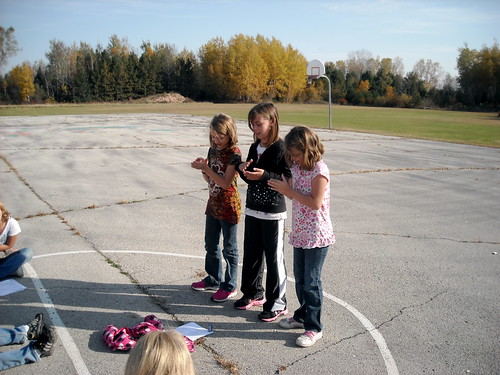
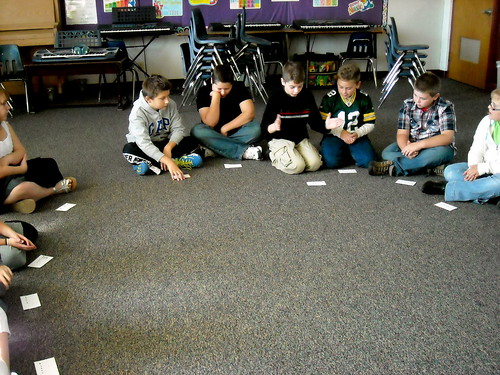
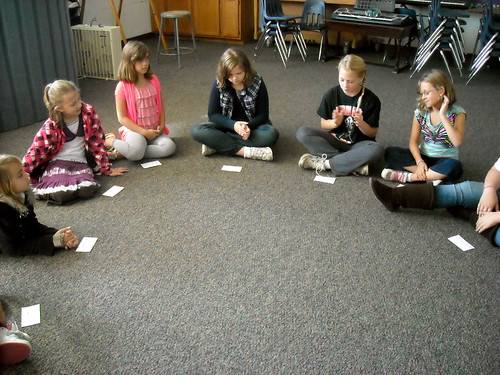
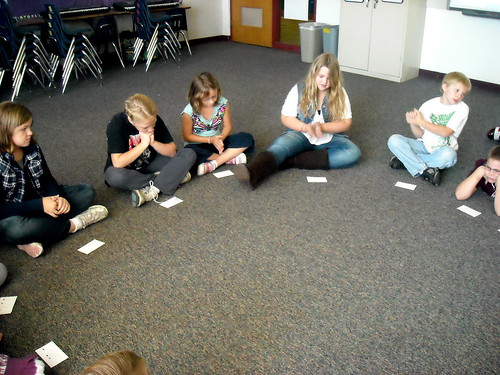
Everyone in the class sits in a circle on the floor.

Rhythm Concentration
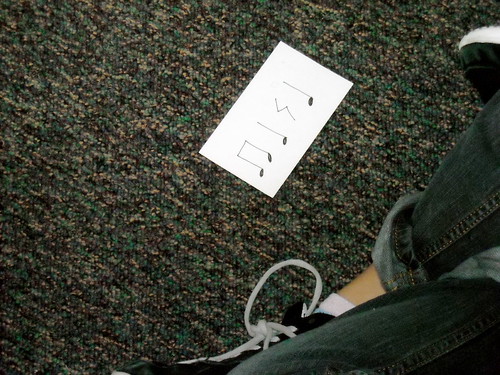
Each student is given a basic rhythm that was written on an index card. (I used only quarter notes, quarter rests, and eighth notes, however you could add in other rhythms your students know)

I then put a piece of tape or something to mark the 'beginning/end' of the circle. The person on the right of the marker is #1. The goal of the game is to be #1 at the end of the game.

The #1 person claps their rhythm and then #2 claps their rhythm immediately after. This continues all the way around the circle. During the first round, I normally just let them practice their rhythm. However, after that it gets harder.

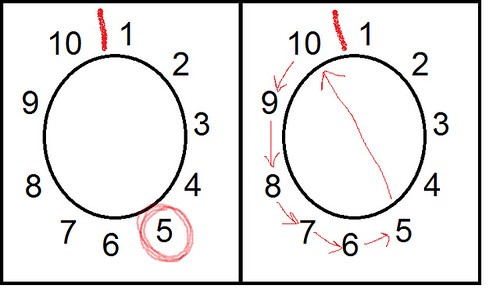
Students continue clapping their rhythms as they continue around the circle. When someone misses their turn or hesitates that student has to go to the end (to the left of the marker). Their rhythm stays where it is and then students fill in the spaces. For example: if #5 of #10 misses their turn #10 shifts to #9; #9 shifts to #8; #8 shifts to #7; #7 shifts to #6; #6 shifts to #5; and #5 shifts to #10!

For those visual learners like myself, a model of the switch!:
rhythm concentration switch

After that it gets even more difficult. I start sending people to the end of the circle for clapping the wrong rhythm, not doing it in beat, and I have even added the metronome for some of my older students and they have to stay in beat.

Rhythm Concentration

My students really seem to like it. What I like most about it is it is fast paced, so those that get frustrated with waiting for everyone to get a turn don't feel that way during this game. I also like it because they are practicing their rhythms without feeling like they are practicing rhythms!

Rhythm Concentration

If you try this out, please let me know how it goes or any changes you made to make the game run smoother! Also feel free to ask me questions about it, I'll do my best to answer them. Have fun!

Saturday, September 8, 2012

Challenge #5 - Collage Technique

Guidelines:
  • You need to create ONE scrapbook page for this challenge (Remember: one page is the two pages side by side)
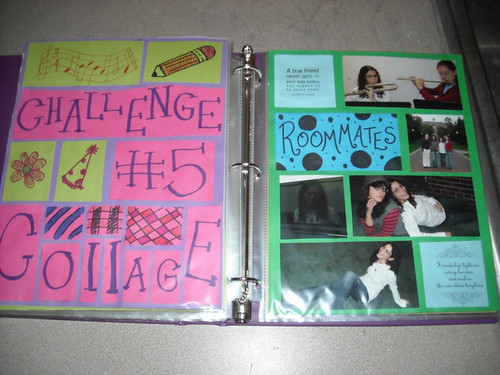
  • Create a collage of photos on either side of your scrapbook page. This collage needs to contain AT LEAST 5 pictures.
  • You may only use 5 stickers, stamps, punches, etc. for this challenge. (Remember the focus is to use a lot of pictures, not a lot of ‘stuff’)
  • A journal is allowed, but not a requirement.
  • Use at least 8 pictures for this page. If you do not have enough pictures make sure to get some for this page!
  • Remember to make your page neat and clean!

Tips & Tricks:
  • Measure, measure, measure! The pieces of paper most of you are working with are 8 ½”x11”. Measure your pictures to fit into that.
  • Use a ruler and be careful NOT to cut your pictures until you are completely certain you are right. You can always cut more off later, but you can NOT put it back on once it is off.
  • Do not worry about titles, stickers, etc. until the VERY end. You may not even have a title. That is alright! The focus this week is the pictures!
  • Be creative in how you put the pictures together. Use the templates provided on your table for ideas and inspiration.

For this challenge I gave my students a set of templates which I took from this website-->Scrapbook, Etc.<--
This helped students create their own layouts or cut pictures to fit the given layout.

Challenge Points:
  • Creativity
  • Follow Directions
  • Teamwork
  • Time Management
  • Neatness

My Example:
Challenge #5 - Collage Example

Winner of Challenge #5:
Challenge #5 - Collage

Thanks for Reading!

Challenge #4 - 'Themespiration'

Guidelines:
  • Create ONE scrapbook page for this challenge (Remember: one scrapbook page is actually two single pages side by side)
  • Decide on a theme for your page and have at least 3 things on your page that help represent this theme (this does not include pictures!). At least one of these things should be made by you! More will result in more points! This is your chance to be artistic!
  • There is no limit on the amount of stickers, punches, or stamps you can use for this challenge, but keep in mind you do NOT want your page to look cluttered. Make your hard work stick out!
  • A journal is welcome, but not a requirement for this challenge.
  • Remember, that, if you choose to title your page it should be neat and clean.

Tips & Tricks:
  • Choose a theme first! Remember you do not need a lot of pictures for this theme (2-4 will be plenty). However, you want to decide what you are going to create to make this theme come alive. Take a look at the examples in my binder to help you get started!
  • Spend the majority of the time, the first day (and maybe even second day), creating your theme items. These should be neat, clean, and be using your best artistic skills (some have more skills than others, that is okay! Just do YOUR best!)
  • Find a way to have your theme items really stand out and do not add a lot of clutter that takes away from the items you created for you theme.

Challenge Points:
  • Creativity
  • Follow Directions
  • Teamwork
  • Time Management
  • Neatness
  • Items for Theme

My Example:
Challenge #4 - Themespiration Example
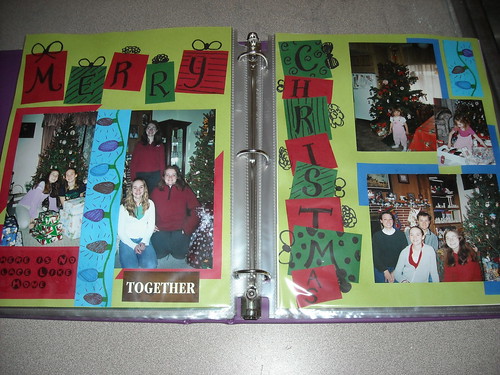
Notice the Christmas Presents creating the words Merry Christmas. This is one of the items I created to represent the theme.

Winner of Challenge #4:
Challenge 4 - Themespiration

Thanks for Reading!

Thursday, September 6, 2012

Challenge #3 - Ripping Technique

Guidelines:
  • You need to create TWO scrapbook pages for this challenge (Remember: one page is the two pages side by side, so you are really creating four single pages)
  • Must using the ripping technique at least twice on each page. Using it more is recommended. Keep in mind that you want to rip towards yourself to make the effect obvious!
  • Can only use a combination of 15 stickers and pictures.
  • A journal is suggested, but not an expectation. You can decide whether you want to include one or not. However, keep in mind that you will probably get additional points for adding a journal to your page.
  • If you choose to title your page remember to make it look neat and clean!

Tips & Tricks:
  • When ripping you should rip towards yourself. If you forget, just turn the piece around.
  • LAYER: sometimes rips in front of pictures sometimes pictures in front of rips.
  • Cardstock (heavy paper) works best for ripping. Lighter paper may not show the nice rips. Because of this it may be smart to use the lighter paper as a background and the solid cardstock as your ripping paper.

Challenge Points:
  • Creativity
  • Follow Directions
  • Teamwork
  • Time Management
  • Neatness

My Example:
Challenge #3 - Ripping Example

Winner of Challenge #3:
Challenge 3 -  Ripping Technique

Thanks for Reading!

Wednesday, September 5, 2012

Challenge #2 - Geometric Shapes

Guidelines:
  • Pick a geometric shape as inspiration for your design. Some examples of geometric shapes include circles, parallelograms, squares, rectangles, triangles, trapezoids, octagons, hexagons, pentagons, stars, hearts
  • Title your page using stencils, nice printing, or stickers
  • Must use at least 10 of the shape of choice (Keep in mind, this does not mean one star, one heart, one circle, 3 squares, etc. Instead it means if you choose a triangle you use 10 of them in your scrapbook page)
  • Can only use a combination of 10 stickers and pictures
  • Must include a journal. This journal should have something to do with the page, but is NOT the description of pictures. Instead, it is a reflection on something. For example: if you have pictures of a vacation you could journal about what you did that specific day.

Tips & Tricks:
  • Before you do anything you should choose the shape you are going to use.
  • Cut out several shapes of various sizes and start to arrange them on your page. DO NOT glue them down right away.
  • Arrange pictures and a short journal around the shapes. Layering some shapes over pictures and some under will give it a more exciting look.
  • Make sure your shapes fit with the color scheme of paper. For example: if you pick a patterned paper that has a lot of orange, yellow, and red you should probably cut out shapes that are similar to this color.

Challenge Points:
  • Creativity
  • Follow Directions
  • Teamwork
  • Time Management
  • Neatness

My Example:
Challenge #2 - Geometric Shapes Example

Winner of Challenge #2:
Challenge 2 - Geometric Shape

Thanks for Reading!

Tuesday, September 4, 2012

Challenge #1 - Creating a Pattern

The third class that I taught during the summer was a Scrapbooking class. This class was by far my favorite to teach. I was a little worried going into it that students would not actually practice the techniques that I taught them. This was something I was warned about by the current art teacher. To solve this dilemma, my friend E came up with a brilliant solution: Scrapbooking challenges! I created five different challenges to go with the five different techniques we worked on throughout the summer. Students then worked on these challenge pieces and turned them in after a certain amount of time.

For each challenge I created PowerPoints with guidelines, tips & tricks, and challenge points (what they are 'graded' on).

The first challenge was creating a pattern that somehow represents yourself. The guidelines for the first challenge were as follows:
  • Create a pattern using stamps, markers, pens, etc. that somehow represents you
  • Must use AT LEAST ONE stamp
  • Use at least one picture of yourself
  • Include at least 4 interesting facts about yourself on the page
  • Can only use a combination of 10 stickers and pictures

Tips & Tricks to help students with the challenge:
  • Only have two to three focal points (things that REALLY catch your eye)
  • PLAN, PLAN, PLAN!
  • Focus on the pattern FIRST!
  • Pick colors that allow the pattern to stick out

Students were 'graded' on the following Challenge Points:
  • Creativity
  • Follow Directions
  • Teamwork (Working with those around you and helping them)
  • Time Management (Working hard and using the time given to make a great product!)
  • Neatness

My example:
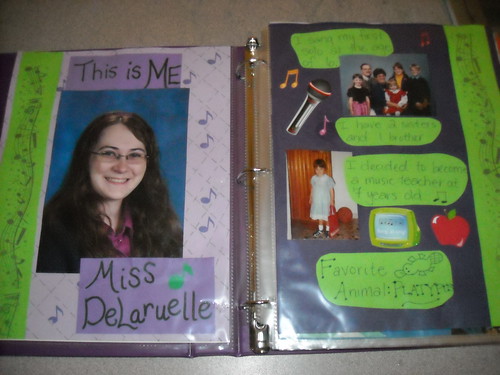
Challenge #1 - Pattern Example

At the end of 3 work days (50 minute classes), students turned in their work. I looked through all the work and added the points up. I then chose one winner to receive a bookmark and have their picture taken with their work. I also chose a team winner. The team was based on an average of points based on the number of teammates. It was amazing how excited students got about this after the first challenge.

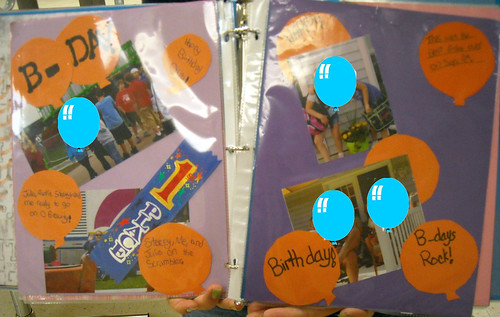
To see what great work my students came up with, I will post the winning pages of each challenge. Keep in mind these pages were created by 8-11 year olds. I also have put images in front of pictures to keep my students identities a mystery.

Here is Challenge #1 Winner: Challenge 1 - About Yourself

Thanks for reading!

Monday, September 3, 2012

Fun in the Sun - Week 4 & 5

Week 4 Events:
  • Bochee Ball
  • Lightning (Basketball)
  • Relay Race
  • Scoops in the Hoop

Week 4 Teams:
  • Chad
  • Chile
  • El Salvador
  • Italy

Week 4 we played a mix of games. First, I had two teams play Bochee Ball while the other two teams played a game of Lightning, and then they switched.

I also had them run a relay race with batons and then finally played a game that I just called Scoops in the Hoop. This is a really fun, but challenging game that students really enjoyed. Each student has a scooter they must stay on the entire game. Each team gets a laundry basket as their goal. Many waffle balls are put in the center of the court and each student has a scoop. As soon as the game starts all the students roll to the center and try to get as many balls into their laundry basket as they can. No stealing balls out of the other teams basket and no puppy guarding. Whichever team gets the most balls in their basket, when all the balls are gone, wins the game.

As a fun way to end Summer School, we had water fights 3 of the 4 last days of summer school. The last day it was a little rainy, so we ended up watching a movie instead.

Friday, August 24, 2012

Fun in the Sun - Week 3

The third week of summer school was the week of July 4th. Since July 4th was on a Wednesday this year we had school Monday, Tuesday, Thursday, and Friday. This meant relatively low attendance for the entire week. Plus, having July 4th in the middle of the week meant some took Monday-Wednesday for vacation and some took Wednesday-Friday off.

Due to low numbers I only created two teams this week:
  • Peru
  • Russia

We started off the week with a game of soccer. I was surprised how many of the kids didn't know how to play soccer. Apparently it is one of the few sports they don't have leagues for here. However, I myself grew up around soccer so I am convinced that it is a great sport! I explained the rules and students played a game of soccer.

To go with the soccer game, they played the second day, they had a relay race where students had to dribble the ball between the cones. Many didn't actually dribble it, but I ended up counting it since none of them seemed to know how.

To add to the low attendance, Wednesday, Thursday, and Friday were EXTREMELY hot! This meant some students didn't come to school because they did so much outside in the heat they were exhausted and stayed home on Thursday and Friday.

To deal with the heat I decided to come up with some fun water games to play. I ran to the Family Dollar on Wednesday and bought some supplies. I bought some spray bottles, five gallon buckets, sponges, and plastic cups.

July 5th, I only had 3 students show up for class. I had one of my students fill up both of the 5 gallon buckets of water. We brought them outside and played a water relay game. Since there was only 3 students (2 boys and one girl), we decided to have a relay of boys verses girls. We set up the two 5 gallon buckets next to each other and put two other 3.5 gallon buckets about 5 meters away. Each team got a sponge and the first person ran from the 3.5 gallon bucket to the 5 gallon bucket. Once at the 5 gallon bucket, the person dunk the sponge in the bucket full of water and ran back to the 3.5 gallon bucket. Then the team member squeezed the water into the empty bucket and handed the sponge to the next person on the team. Continuing this process for either a certain amount of time or until one team gets to a certain measurement on the bucket.

After the water relay we had a massive water fight where I, of course, got drenched.

The last day of the week we finished off with some 'target' practice of sorts. One of the teachers made a target station using pool noodles. You can learn how to make this game here. My students really loved this and we ended up playing it again the next week.

Thanks for reading!

Tuesday, August 21, 2012

Fun in the Sun - Week 2

Week 3 Featured Countries
  • Brazil
  • Egypt
  • New Zealand
  • Norway

I learned from the first week that I needed to be the one putting together teams. This way I could make sure that teams were even and fair. Each week this proved to be rather difficult. I did not want the same students together over and over again and I wanted students to feel successful. Unfortunately, when a team was losing often everyone on that team gave up! :( This was extremely frustrating to me as a teacher and I did not know how to deal with it. I just kept trying to remind students that you can't give up all the time.

This weeks events were the following:
  • Ultimate Frisbee
  • Obstacle Course
  • Buddy Walkers

I was really excited about Ultimate Frisbee. The first day we were missing lots of students so I ended up playing Ultimate with the kids. I didn't do terribly, but I kind of warned them ahead of time that having me on their team did not mean they were going to win. However, I was proud of the fact that I caught 3 of 4 passes thrown my way. Not too bad for a music teacher with little athletic ability!

Overall, students did rather well with Ultimate Frisbee. In fact the gym teacher told me she was really impressed to see how well all the kids were doing with it. She said she will have to try playing it with some of the older kids next school year.

The obstacle course was also rather interesting. I set up 2 matching courses. It started with 6 hula hoops right next to each other, followed by a scooter, and about 10 meters away I added a cone with a bean bag placed by it. 5 cones were set up about 2 meters apart and then two cones symbolizing the finish line were set-up 10 meters from that.

Instead of forming a long line it was set up in a square, one obstacle on each side of the square. The fun thing about obstacle courses is there are LOTS of different obstacles you can create and many different set-ups, as well. I set it up so each member of the team had to go through the obstacle course as fast as they could. The team with the quickest time won. (I timed them using my i-Pod.) However, I added 2 seconds for every penalty they got (for not following the rules). Since there were four teams and only two obstacle courses the teams not playing at the time would work to re-set the course as people went through. For example, one person would bring the bean bag back to its start point, one person would direct the next member to go when their teammate reached the finish line, etc.

As, I stated earlier you can have fun creating your own course, but if you are wondering how to do my course here is what the obstacles were:
  1. Students stepped into the hula hoops bringing them over their head and then placing them on the ground. Then they step into the next hula hoop and continue through all of them.
  2. Students must SIT on the scooter and push it to the cone without getting off the scooter. If they fall off they must get back on before continuing to the cone.
  3. Students put the bean bag on top of their head and balance it while going AROUND the cones. If the bean bag falls off they must pick it up before proceeding on.
  4. Dash to the finish line!

Students complained when first told what the obstacles were, but it was apparent once they got started that they had a lot of fun!

The Buddy Walkers are two pieces of wood with strings attached. Students stay on the wood planks and hold the strings while walking together. They are quite a challenge and some did amazingly well together, while others did not.

Thanks for reading!

Tuesday, August 14, 2012

Fun in the Sun - Week 1

My second hour class for summer school was VERY different than my first class. My first hour class was obviously in the computer lab, but my second hour class was Fun in the Sun. My first hour class was students going into grades 1-3, but my second hour class was students going into grades 4-6.

The Fun in the Sun class was based on the Olympics. We did not do all the Olympic events, but we did have different countries as team names and different events that the teams would compete in. Each week we had about three events, which did take almost the entire week to get through.

The first week teams were:
  • Argentina
  • Australia
  • China
  • Germany

The events for the first week were:
  • Team Event - Kickball
  • Racing Event - Hurdles
  • Other Event - Tug-of-War

The biggest challenge of this week was picking teams. I picked teams completely random the first week. Students picked a country from the hat and that is how they ended up with teams. The problem was that everyone on Team Germany ended up being the powerhouse. They won every single game. On the other hand Team Australia had a lot of problems at the beginning of the week getting a long. All of them were good athletes on their own, but they just were not getting along. This led to students quitting in the middle of the game and the other teams not even having to try to win. However, by the end of the week they seemed to be getting along better and working together a little bit better. They even ended up winning one of the Hurdles Races and a couple Tug-of-War matches.

This first week taught me that it is very important to pick teams as the teacher rather than randomly. It leads to fairer teams and a more successful events.

Each week there were new teams and new events to compete in. This meant students had to learn how to get along throughout the week. Some did a great job right away and some took all week to get along.

Monday, July 16, 2012

Summer School 2012

There are a lot of perks to being a music teacher. One of them is that you get to know almost EVERY student in the elementary school. The only ones I do not know are the 4K students, since they do not have music class. Though it can be difficult learning all those names, I find it very important to get to know as much as possible about my students. It may seem tedious, but kids are extremely happy to know you care about them and want to know about them.

In order to get to know my students more I try to pay close attention to them even outside of class. I pay attention to what they play on the playground. I pay attention to who they play with. I try to have conversations with them about things they are interested in and try to relate to them as much as I can.

This summer, I have taken a break from teaching music and instead am teaching Fun with Technology (going into 1-3 grade), Fun in the Sun (going into 4-6), and Scrapbooking (going into 3-6). This has given me the advantage of learning even more about my students. It is amazing how I suddenly see different sides of students I worked with the whole last year.

Summer school will be over this week, but I have learned a LOT of cool stuff that I want to share with you. I have found interesting sites that you may be interested in checking out, I have learned new scrapbooking techniques and much more. This blog for the next couple months will highlight some of the things we have done in summer school that I think may be helpful for all of you.

Thanks for Reading!